Join Our Newsletter for Cozy Home Inspiration, Family Fun, and Delicious Recipes Every Week
12 Easy Ways to Make an Art Studio at Home
When I started unpacking boxes in our new home, I realized the chaos wasn’t coming from moving; it was from my scattered craft supplies. I had paints in the kitchen, glue sticks in the bathroom, and my nature craft leftovers from our last kids’ project shoved in a shoebox.
That’s when I knew I needed an art studio, a space to create, store, and plan without hunting for materials every time inspiration struck. I was especially dreaming about setting things up so I’d be ready for our next big project, something magical and messy like our nature crafts had been. But there was one issue: the only available space was a small bedroom with limited light and no storage built in.
I decided that my art studio didn’t need to be perfect; it just needed to work for me. I painted the walls a soft white to bounce around what little light I had and swapped the old bulbs with daylight LEDs to recreate natural light.
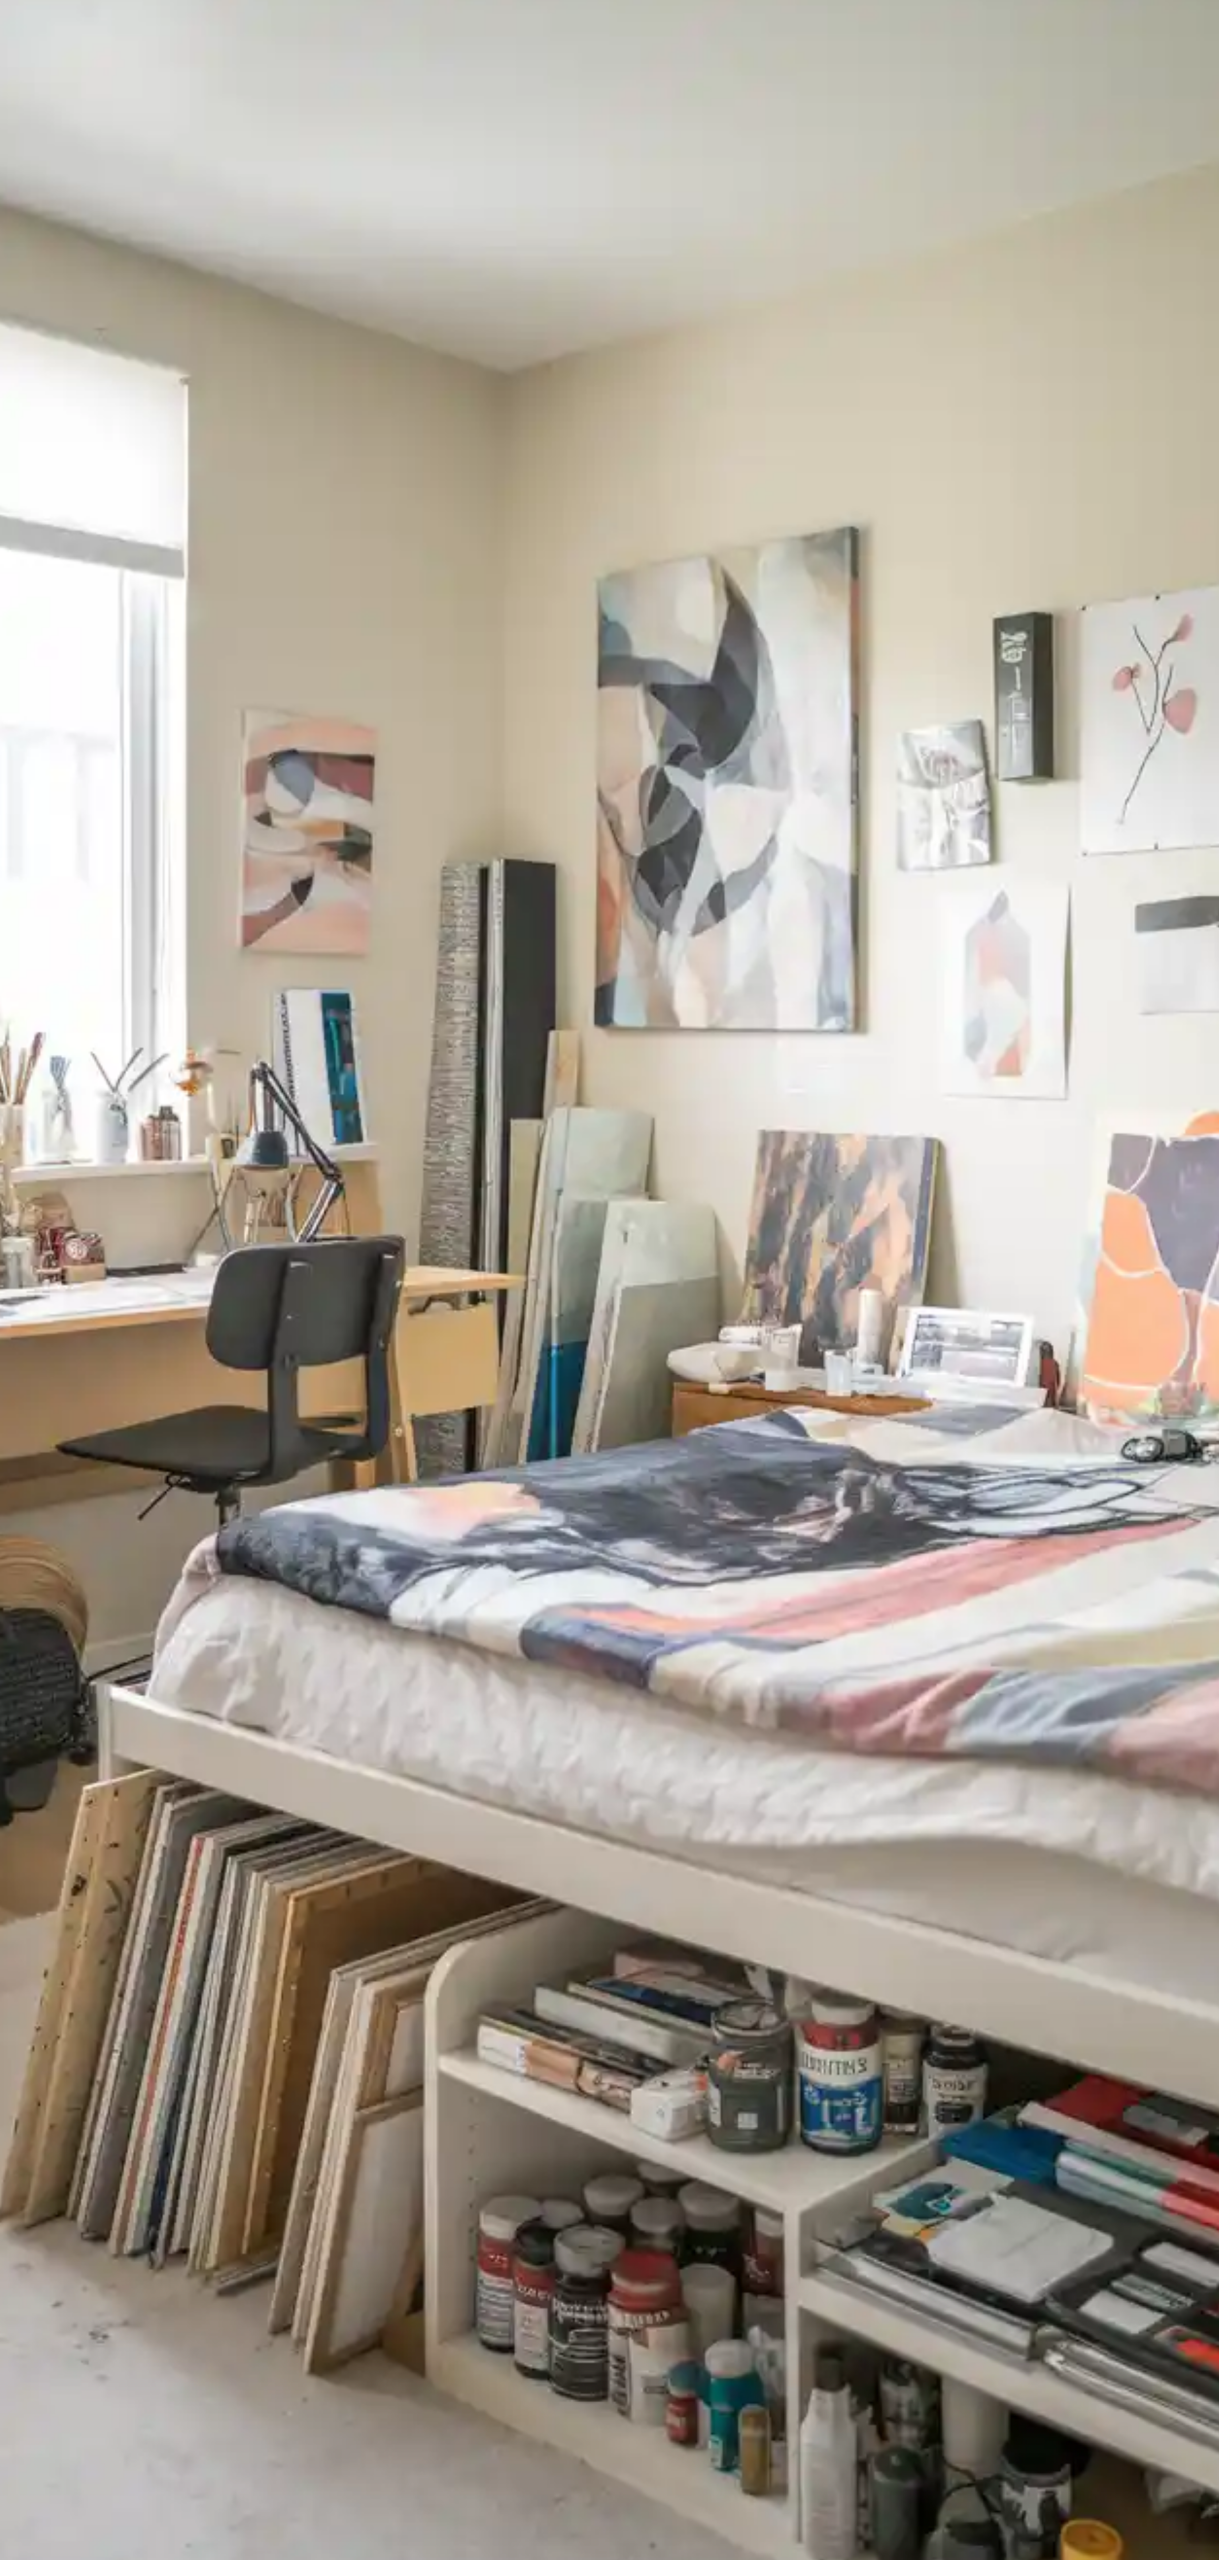
I set up a low table for my kids to join in when we do art together and added stackable cube shelves for paper, paint, and tools. Clear bins and labeled drawers became my best friends.
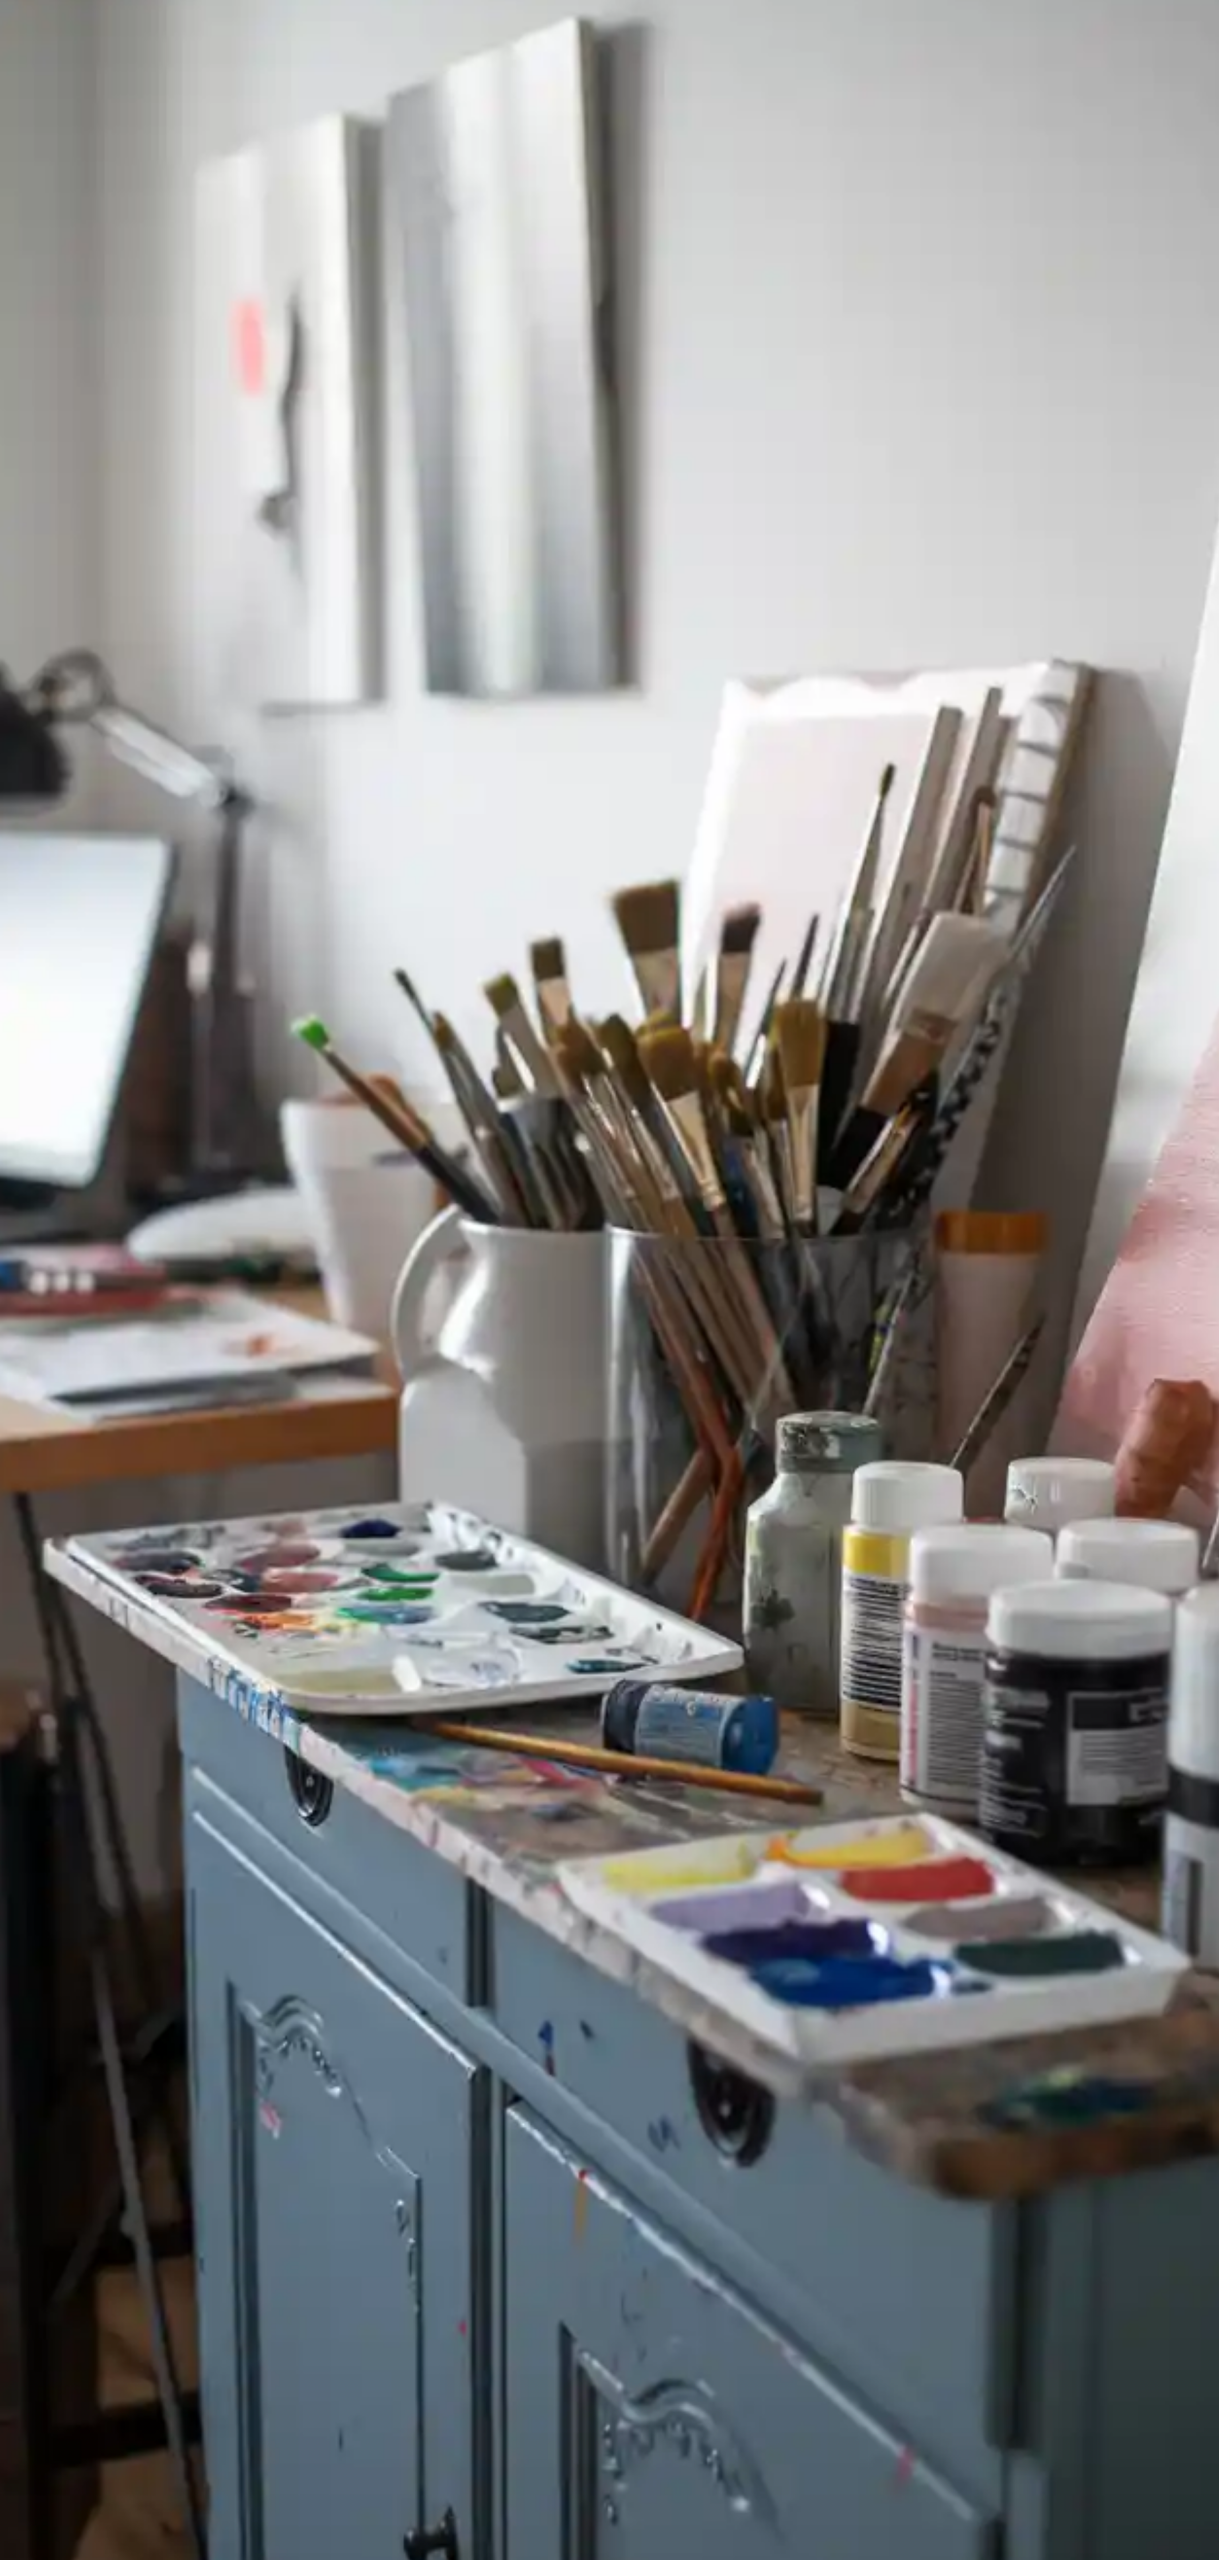
I repurposed mason jars for brushes and used a rolling cart for my most-used supplies. It was far from Pinterest-perfect, but it felt like mine. With a comfy chair and my favorite playlist in the background, it started to become a real creative space, not just another cluttered room.
Now, my art studio is the heart of our creative life at home. The supplies are finally where I need them, within arm’s reach and out of chaos.
The room may not have perfect lighting or a sweeping window view, but it works. Most importantly, it’s ready for whatever comes next, whether it’s watercoloring on a rainy day or crafting leaf fairies with the kids this fall.
Creating this space reminded me that function and feeling matter more than perfection. And when everything is organized and waiting, the ideas come faster than ever.
Creating an art studio at home doesn’t require a warehouse-sized space or a major renovation. With thoughtful organization, clever use of space, and the right setup, you can design a productive and inspiring art environment that matches your creative needs.
12. Divide a Large Living Space
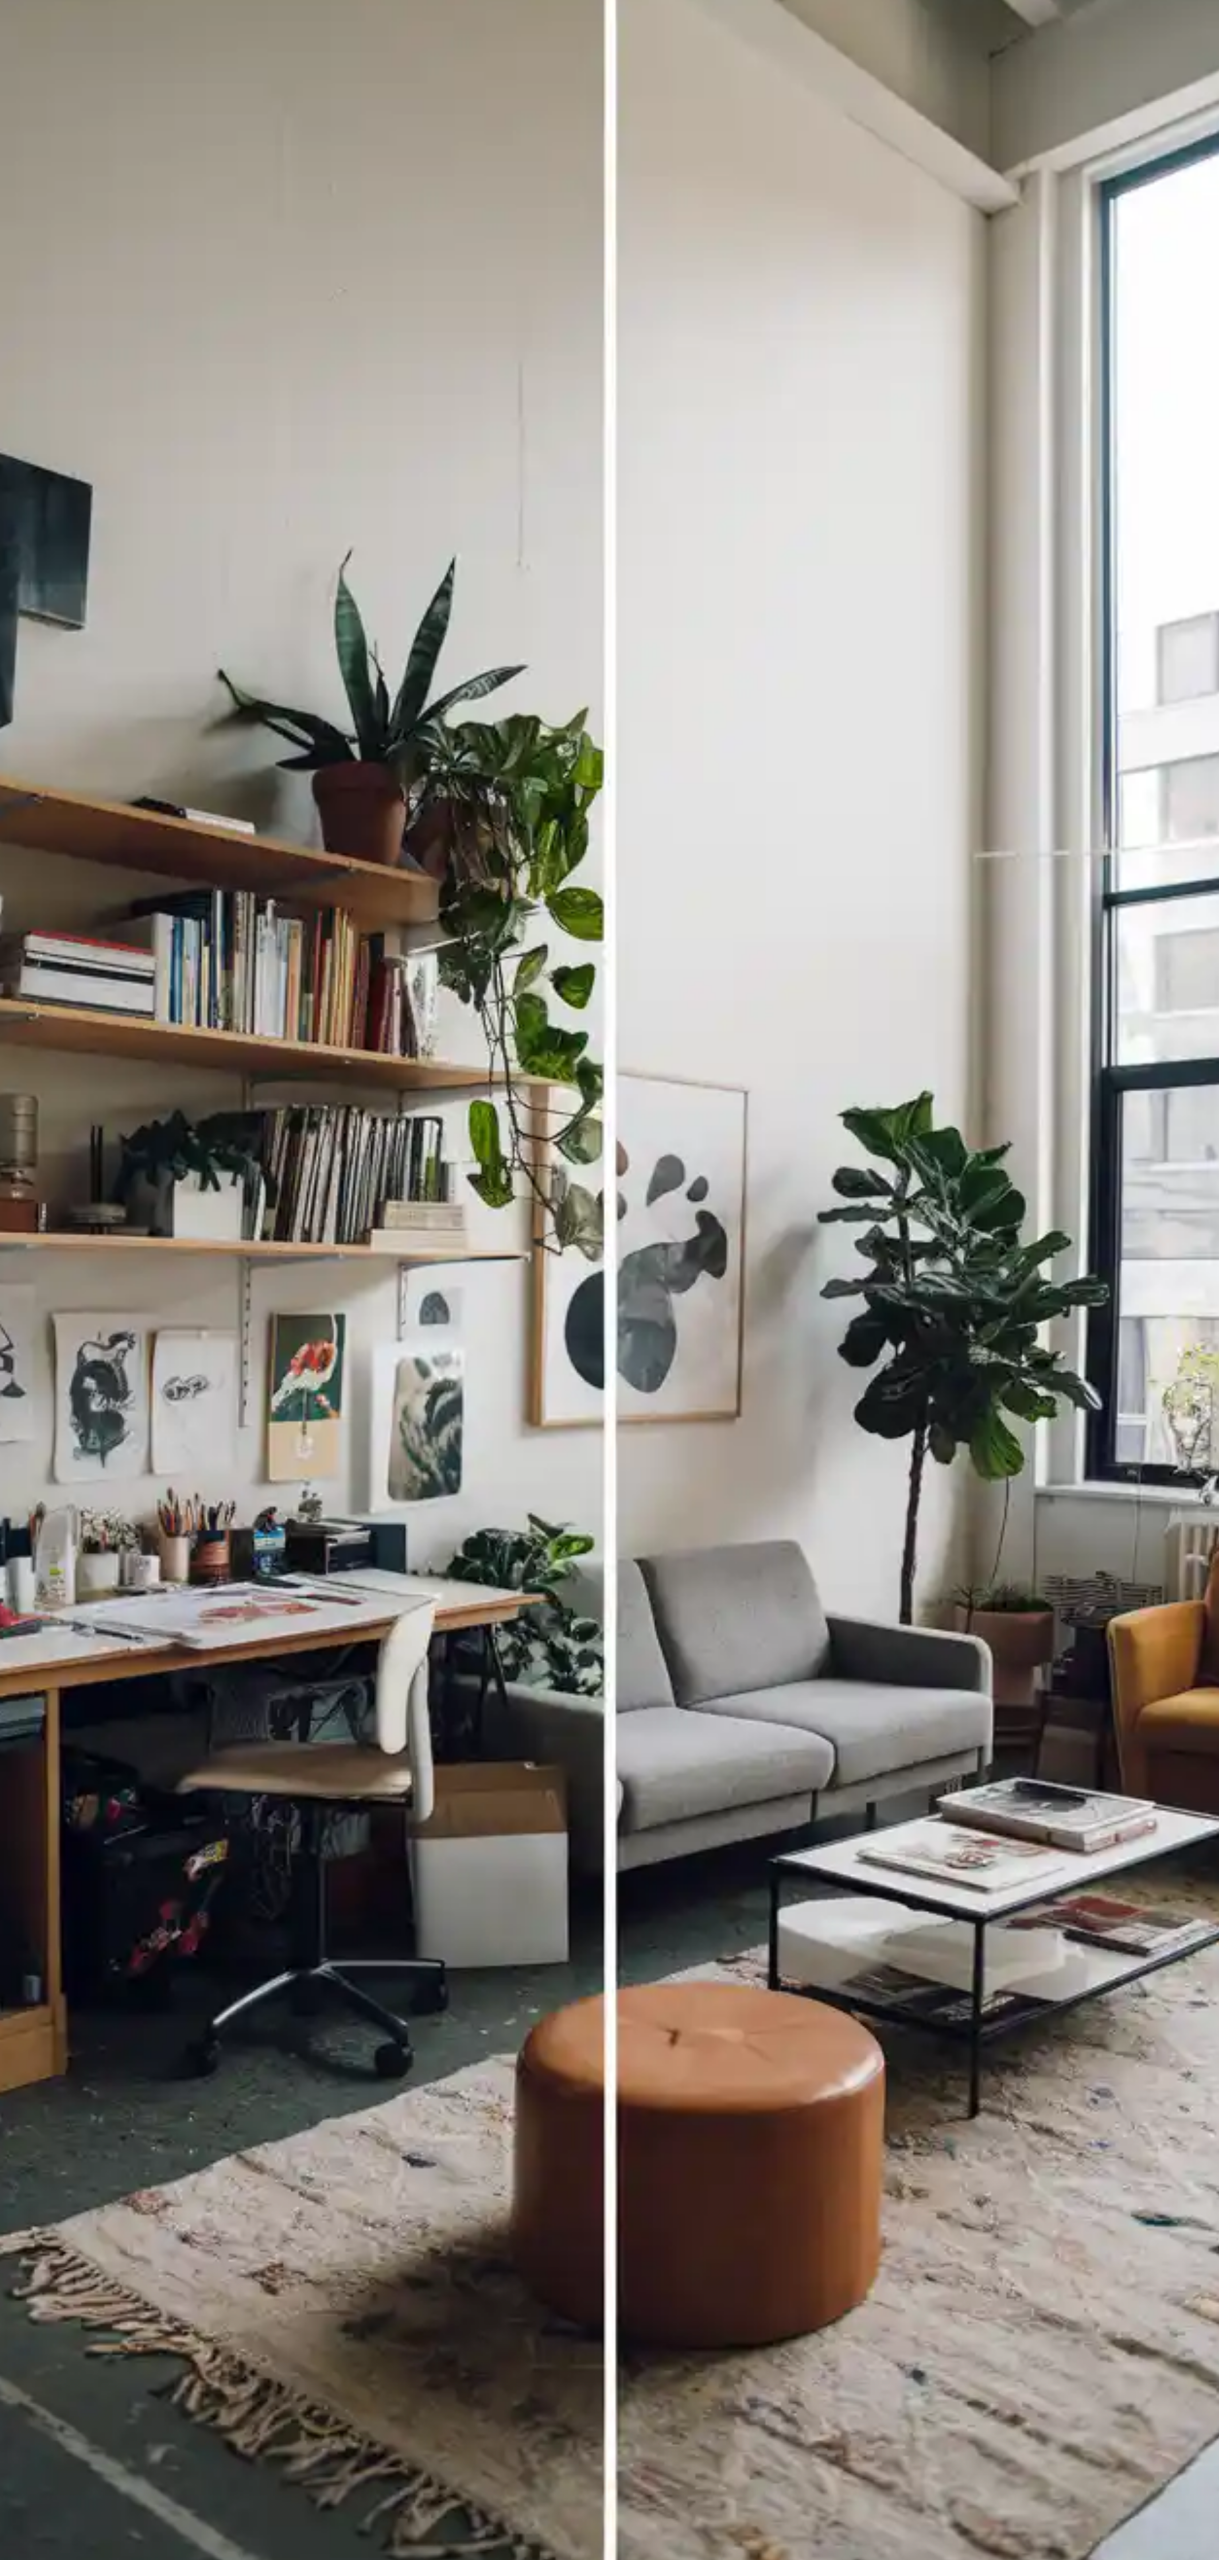
Sectioning off a portion of a living or dining room creates a multi-use environment without sacrificing creativity.
Tips:
- Use open shelving or a bookcase to form a visual divider.
- Add curtains or foldable screens to section off the space when needed.
- Stick to a neutral palette so it blends with your living décor.
- Use nesting furniture or foldable easels for easy storage.
11. Build a Backyard Art Shed
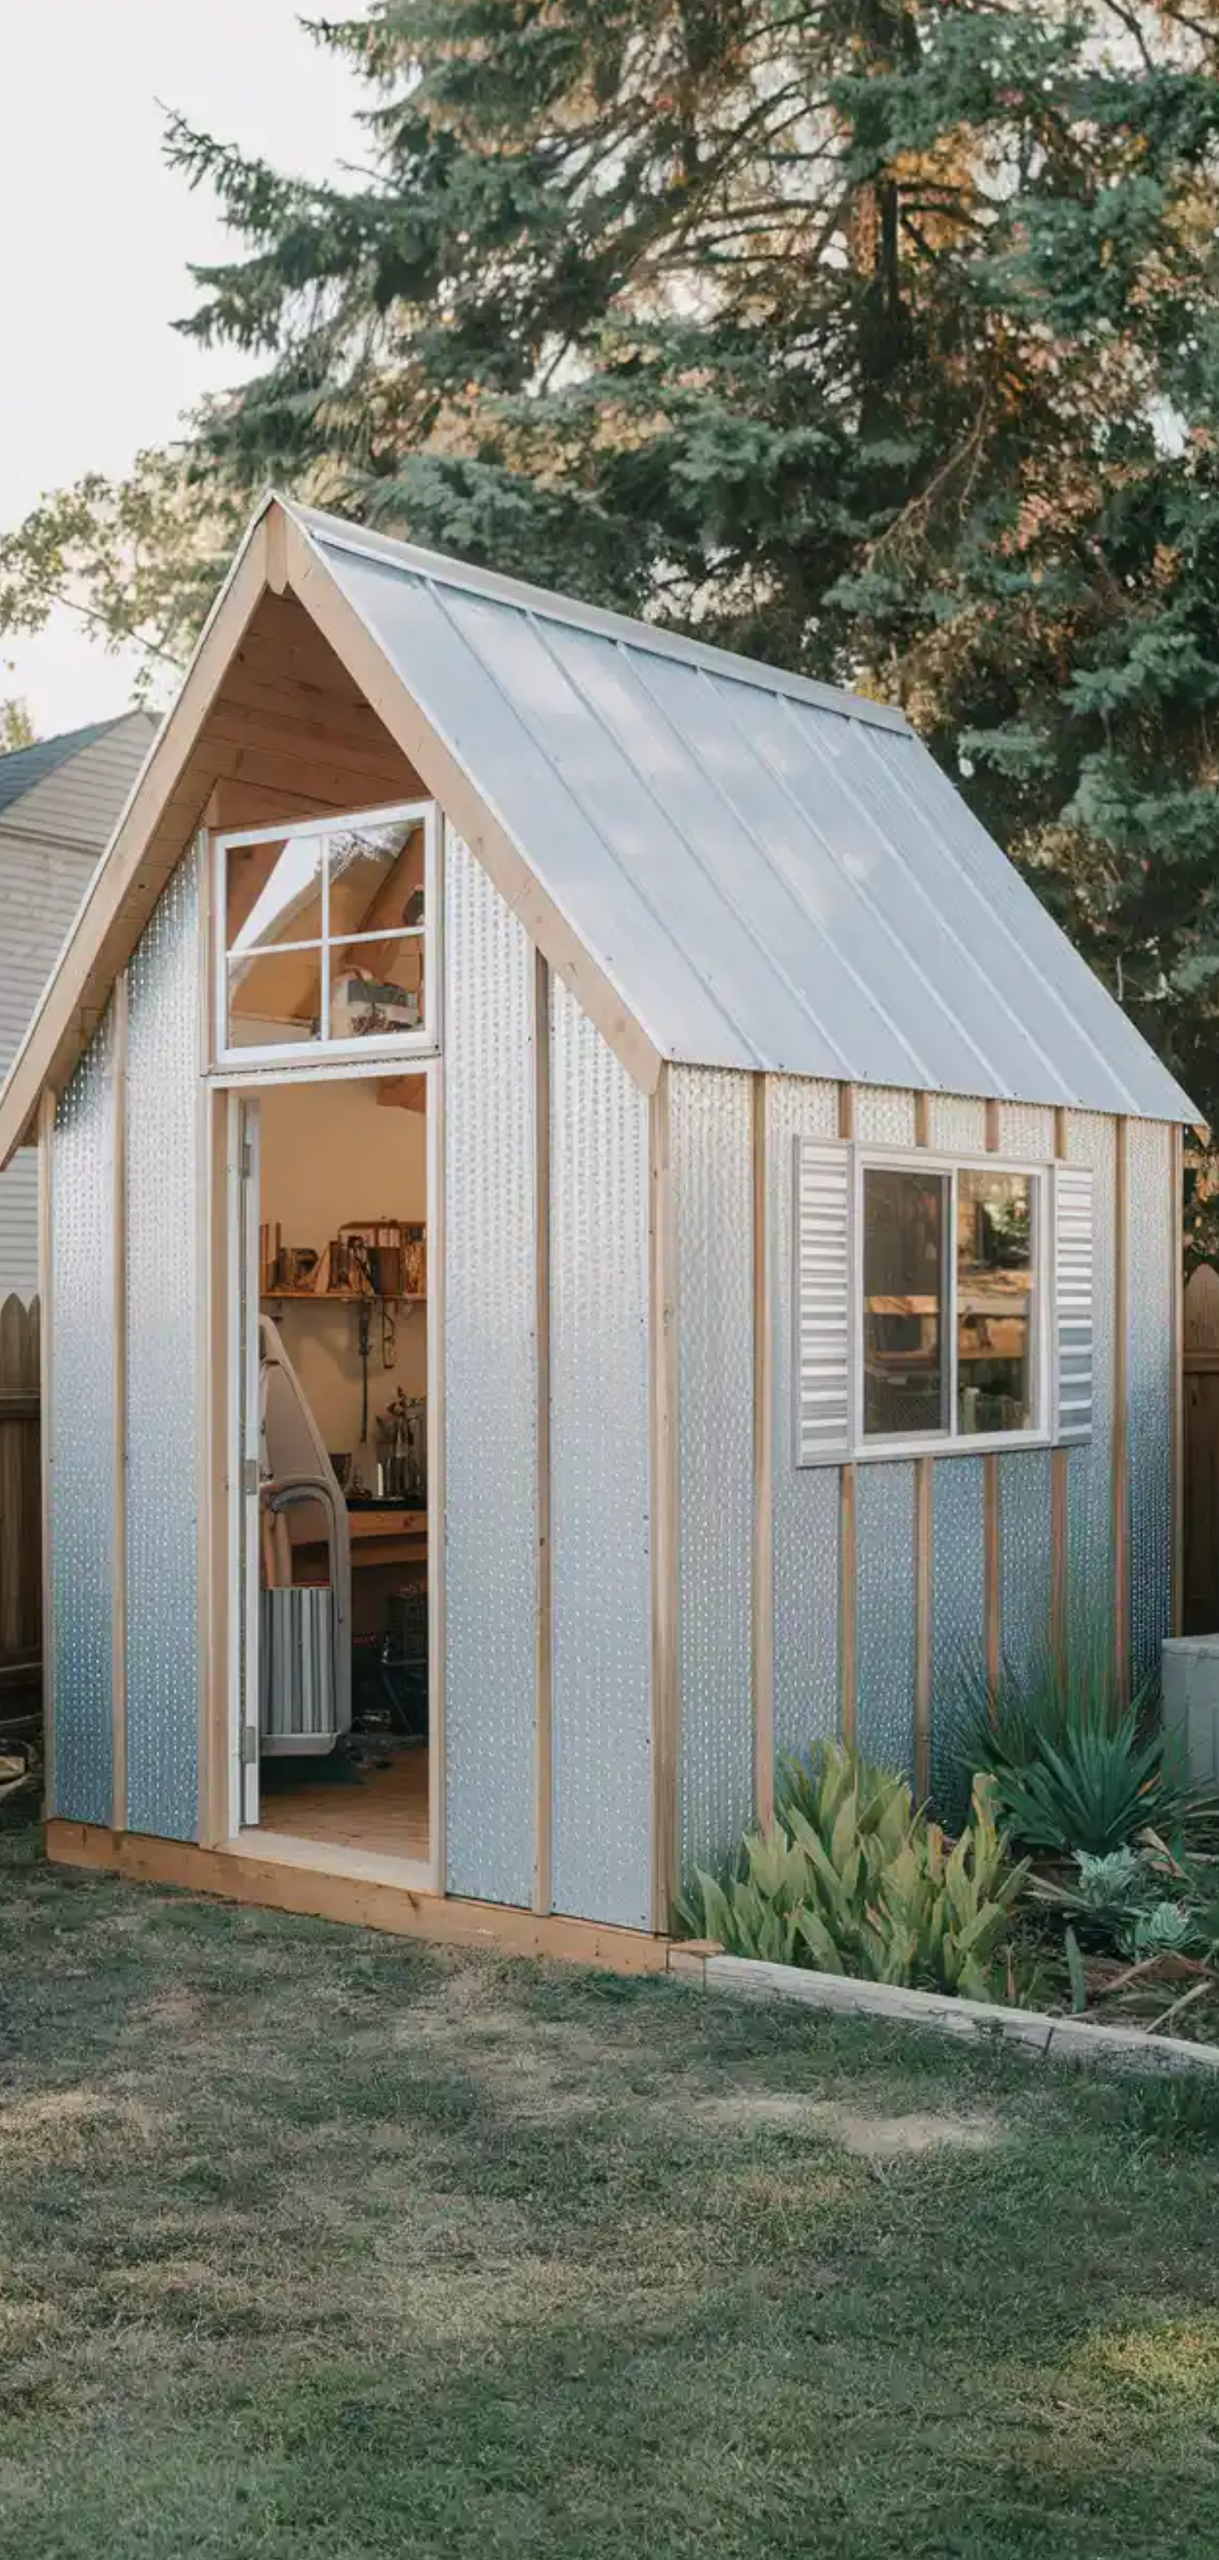
A backyard shed can be converted into a serene creative escape and fully customized to fit your aesthetic.
Tips:
- Insulate walls and install climate control for year-round use.
- Include skylights or full-length windows for optimal natural light.
- Use reclaimed wood or metal shelves to maintain a rustic, artistic feel.
- Add solar-powered lighting to reduce energy costs.
10. Utilize an Attic or Loft Space
An attic offers quiet seclusion, ideal for focused work and large-scale projects.
Tips:
- Ensure proper insulation and ventilation.
- Add skylights or daylight bulbs to counter dimness.
- Use compact, lightweight furniture to avoid overloading flooring.
- Store seasonal supplies in labeled bins under eaves.
9. Transform a Walk-In Closet
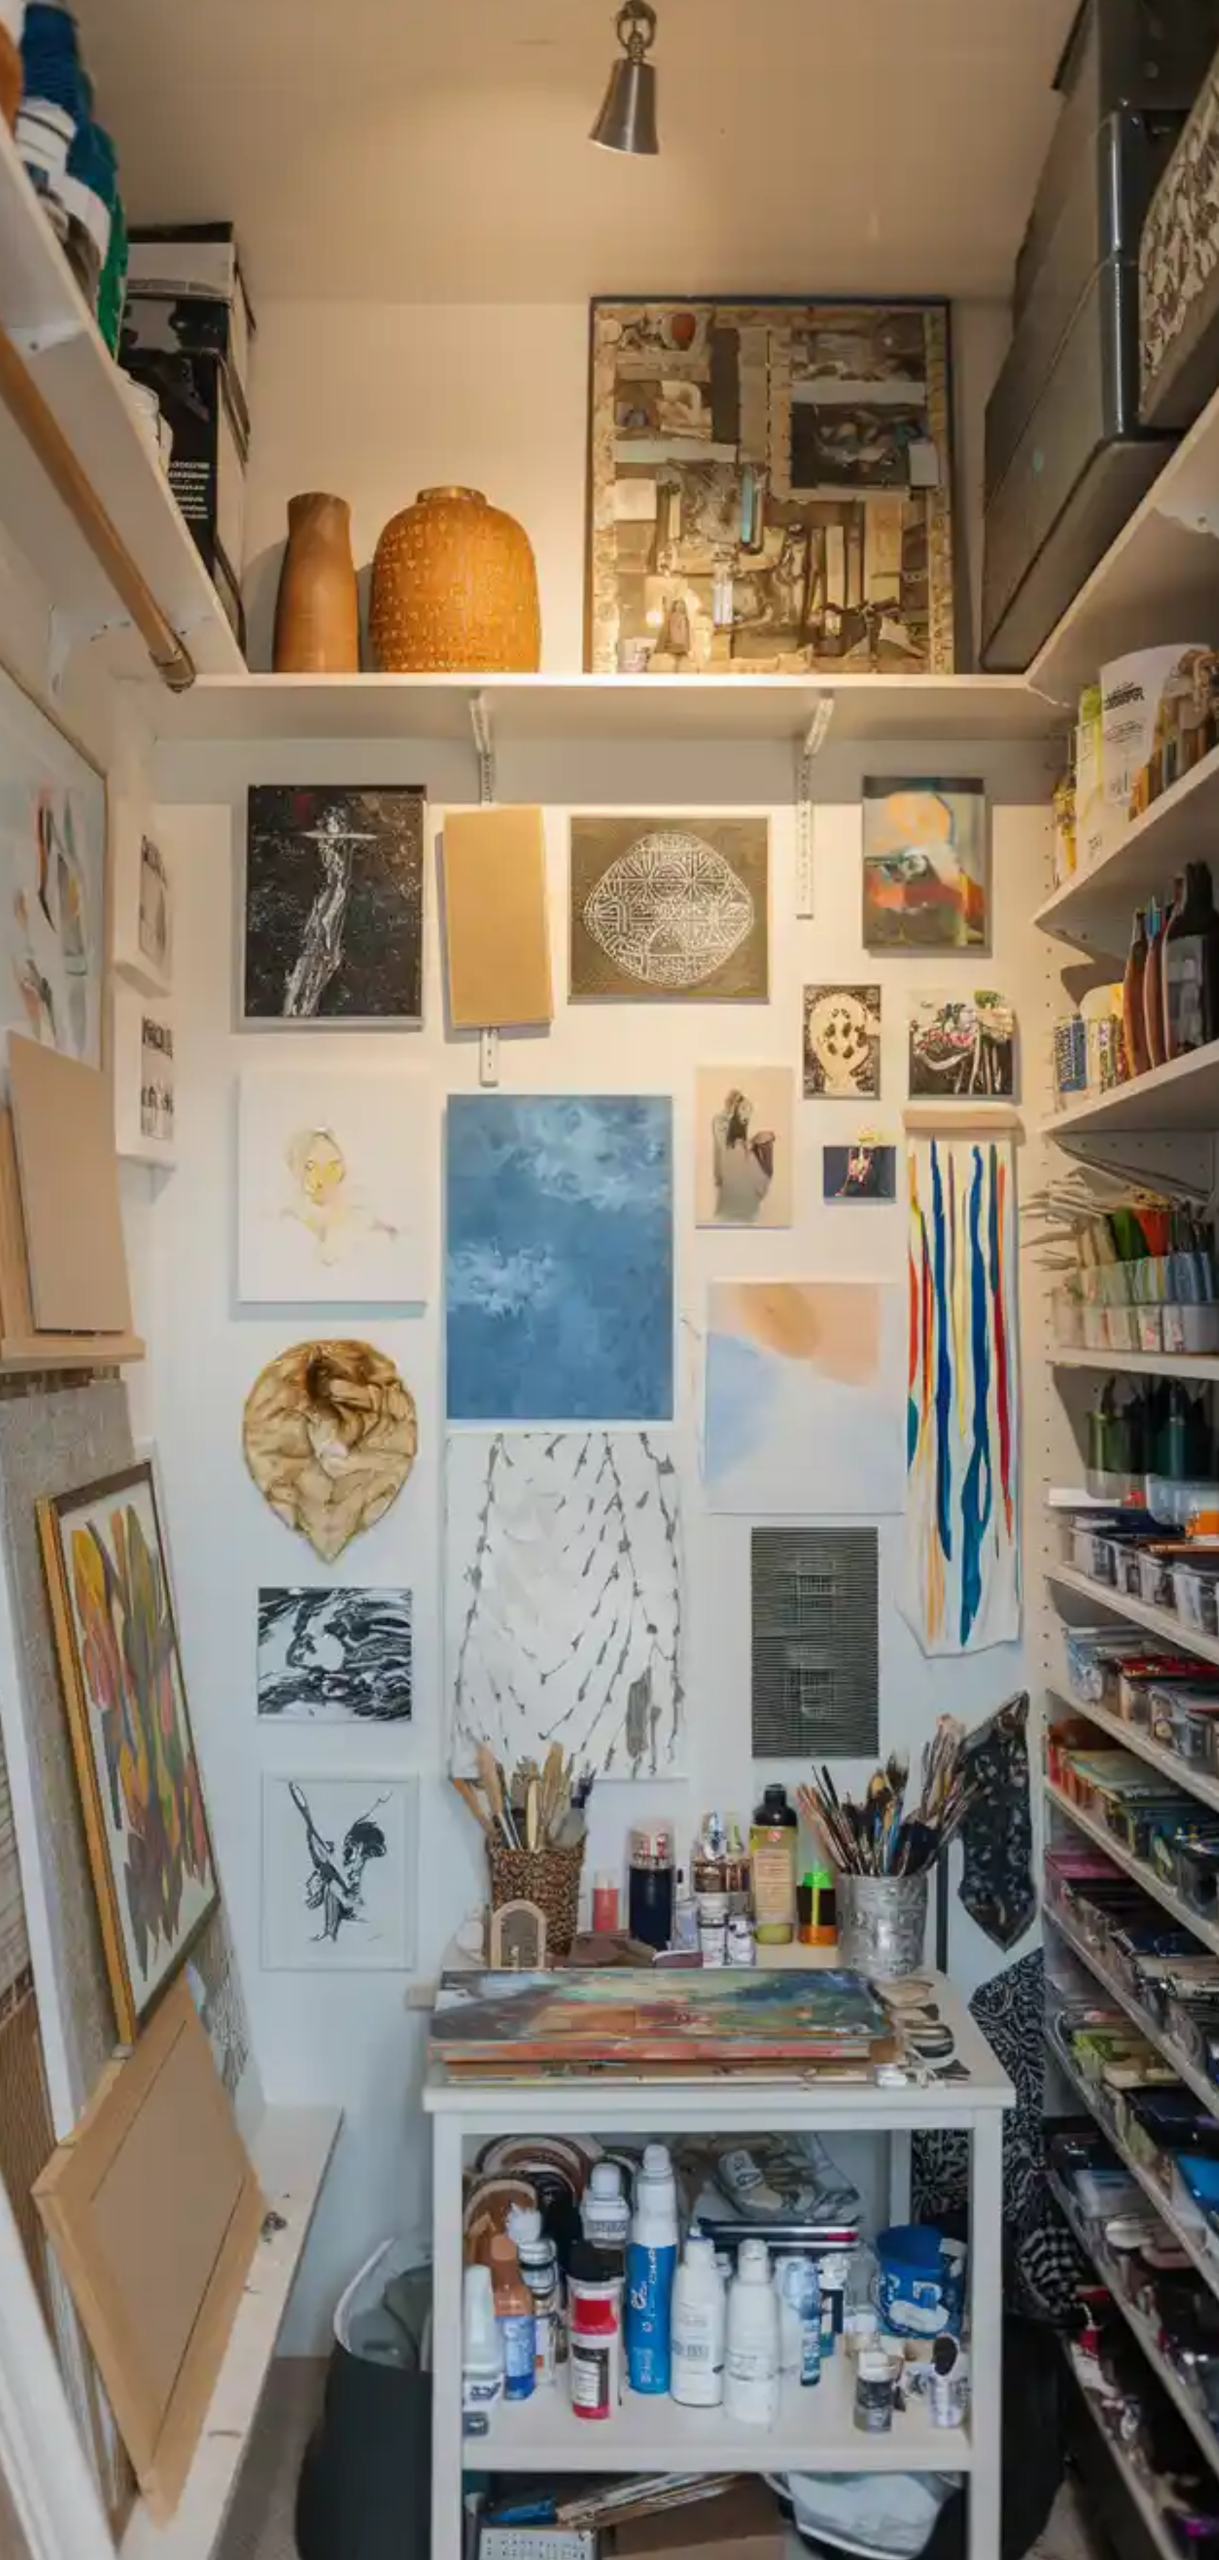
A large closet can be an art studio in disguise, offering privacy and containment.
Tips:
- Replace the door with a curtain or sliding panel.
- Add a wall-mounted fold-down desk.
- Use vertical pegboards for brushes, palettes, and scissors.
- Install a strip of LED lights under the shelves.
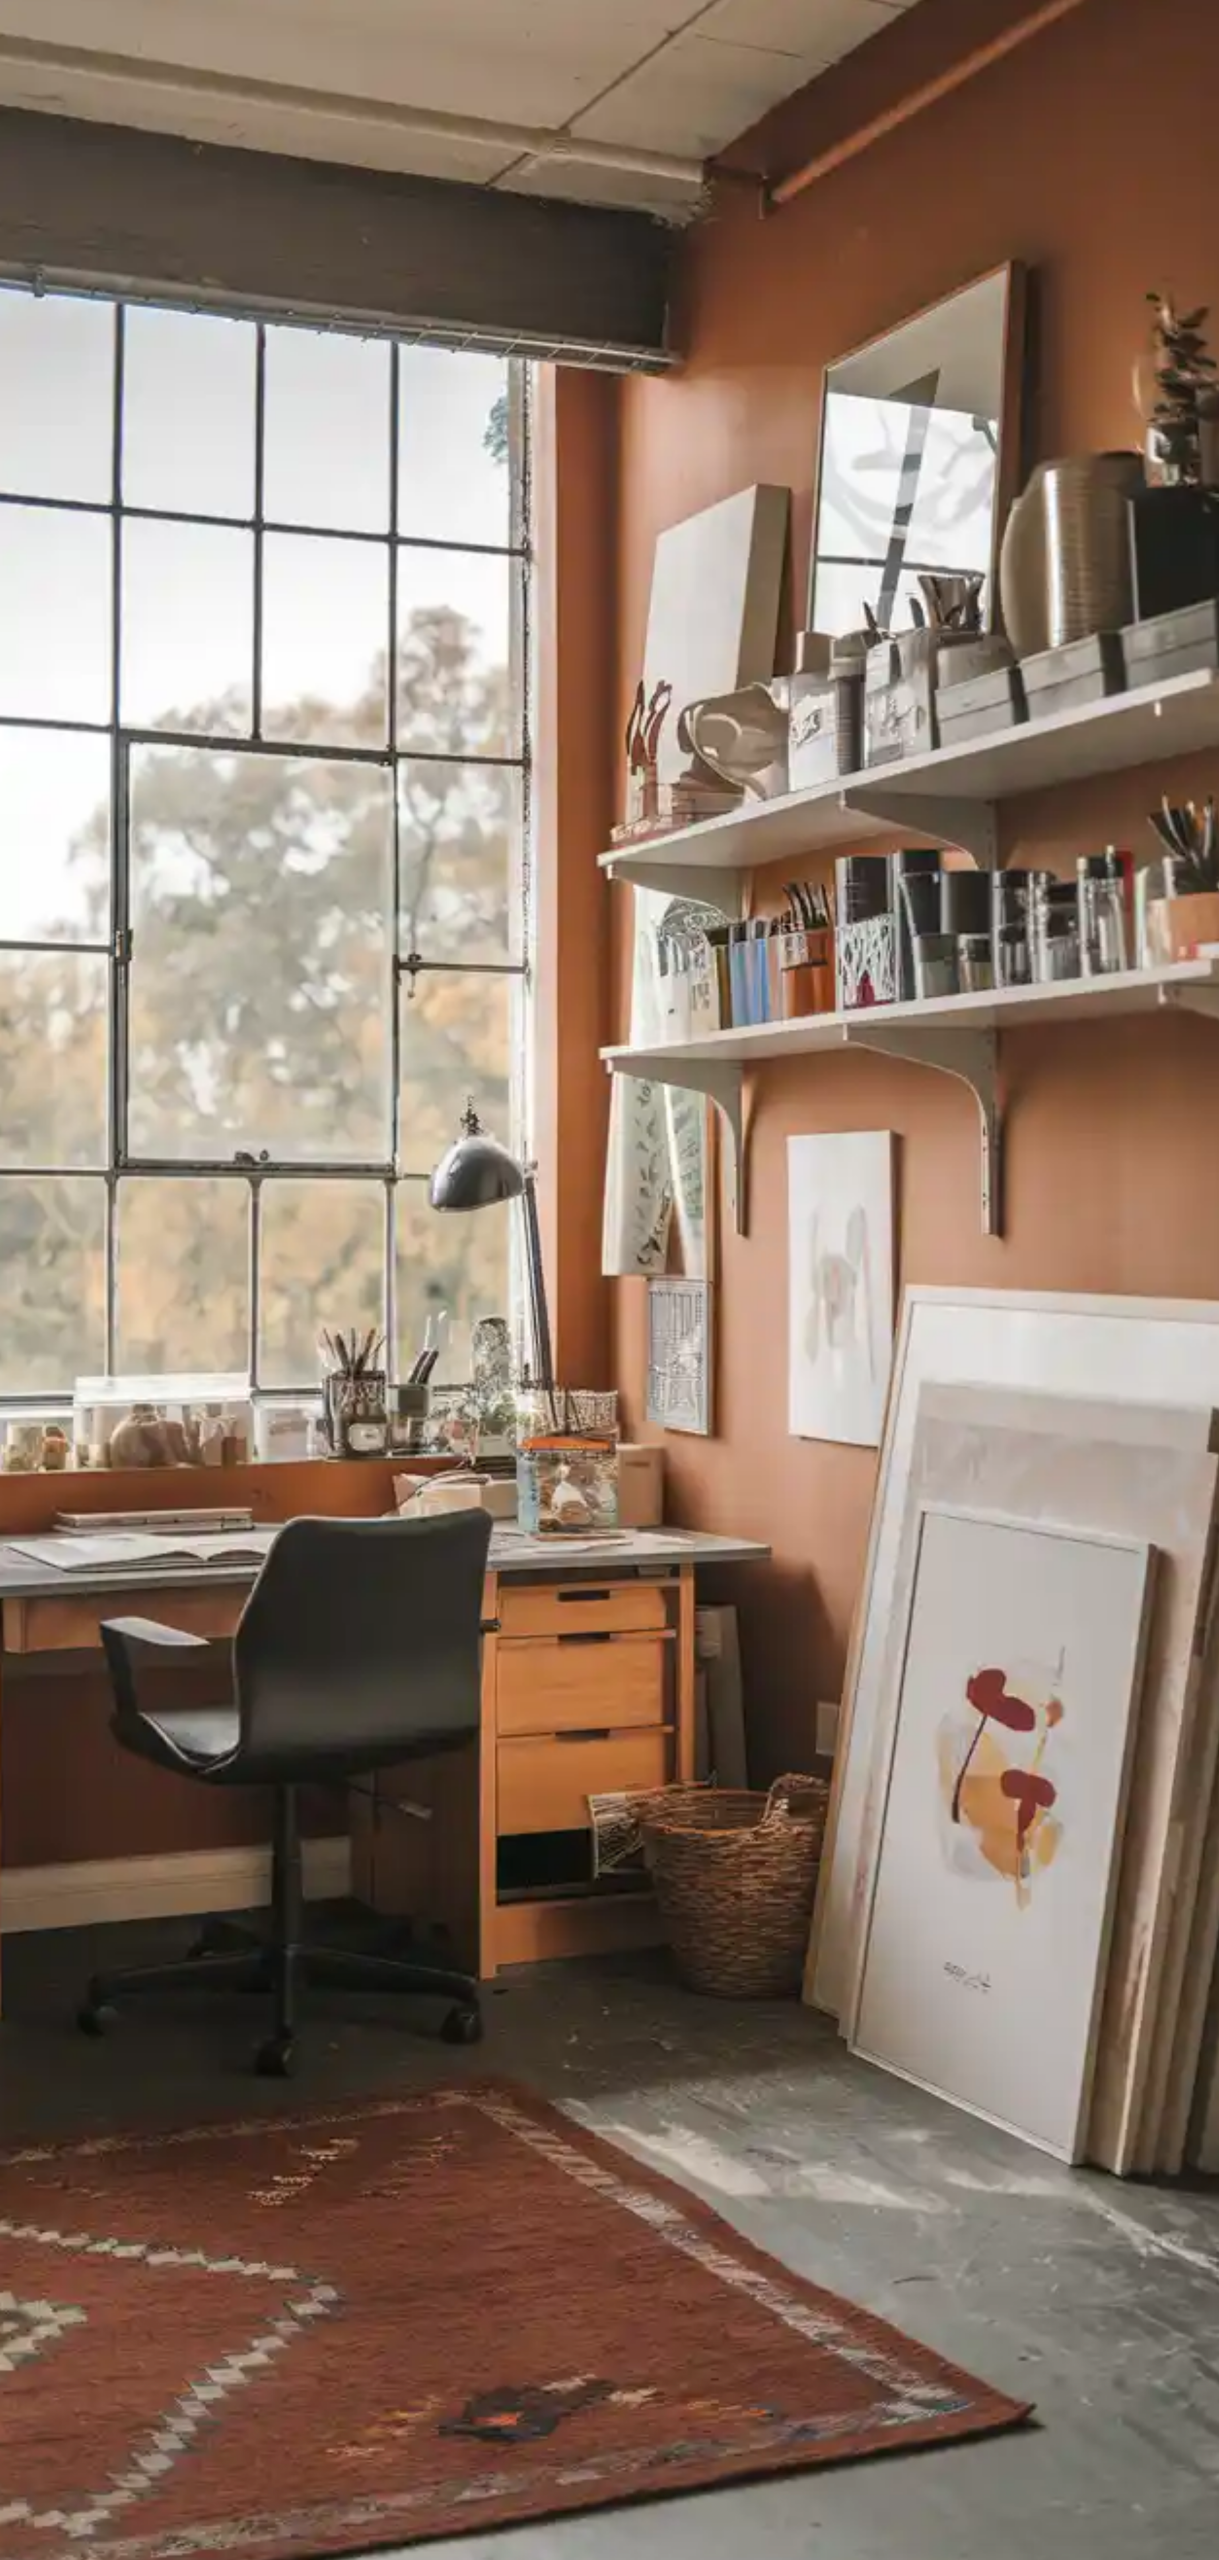
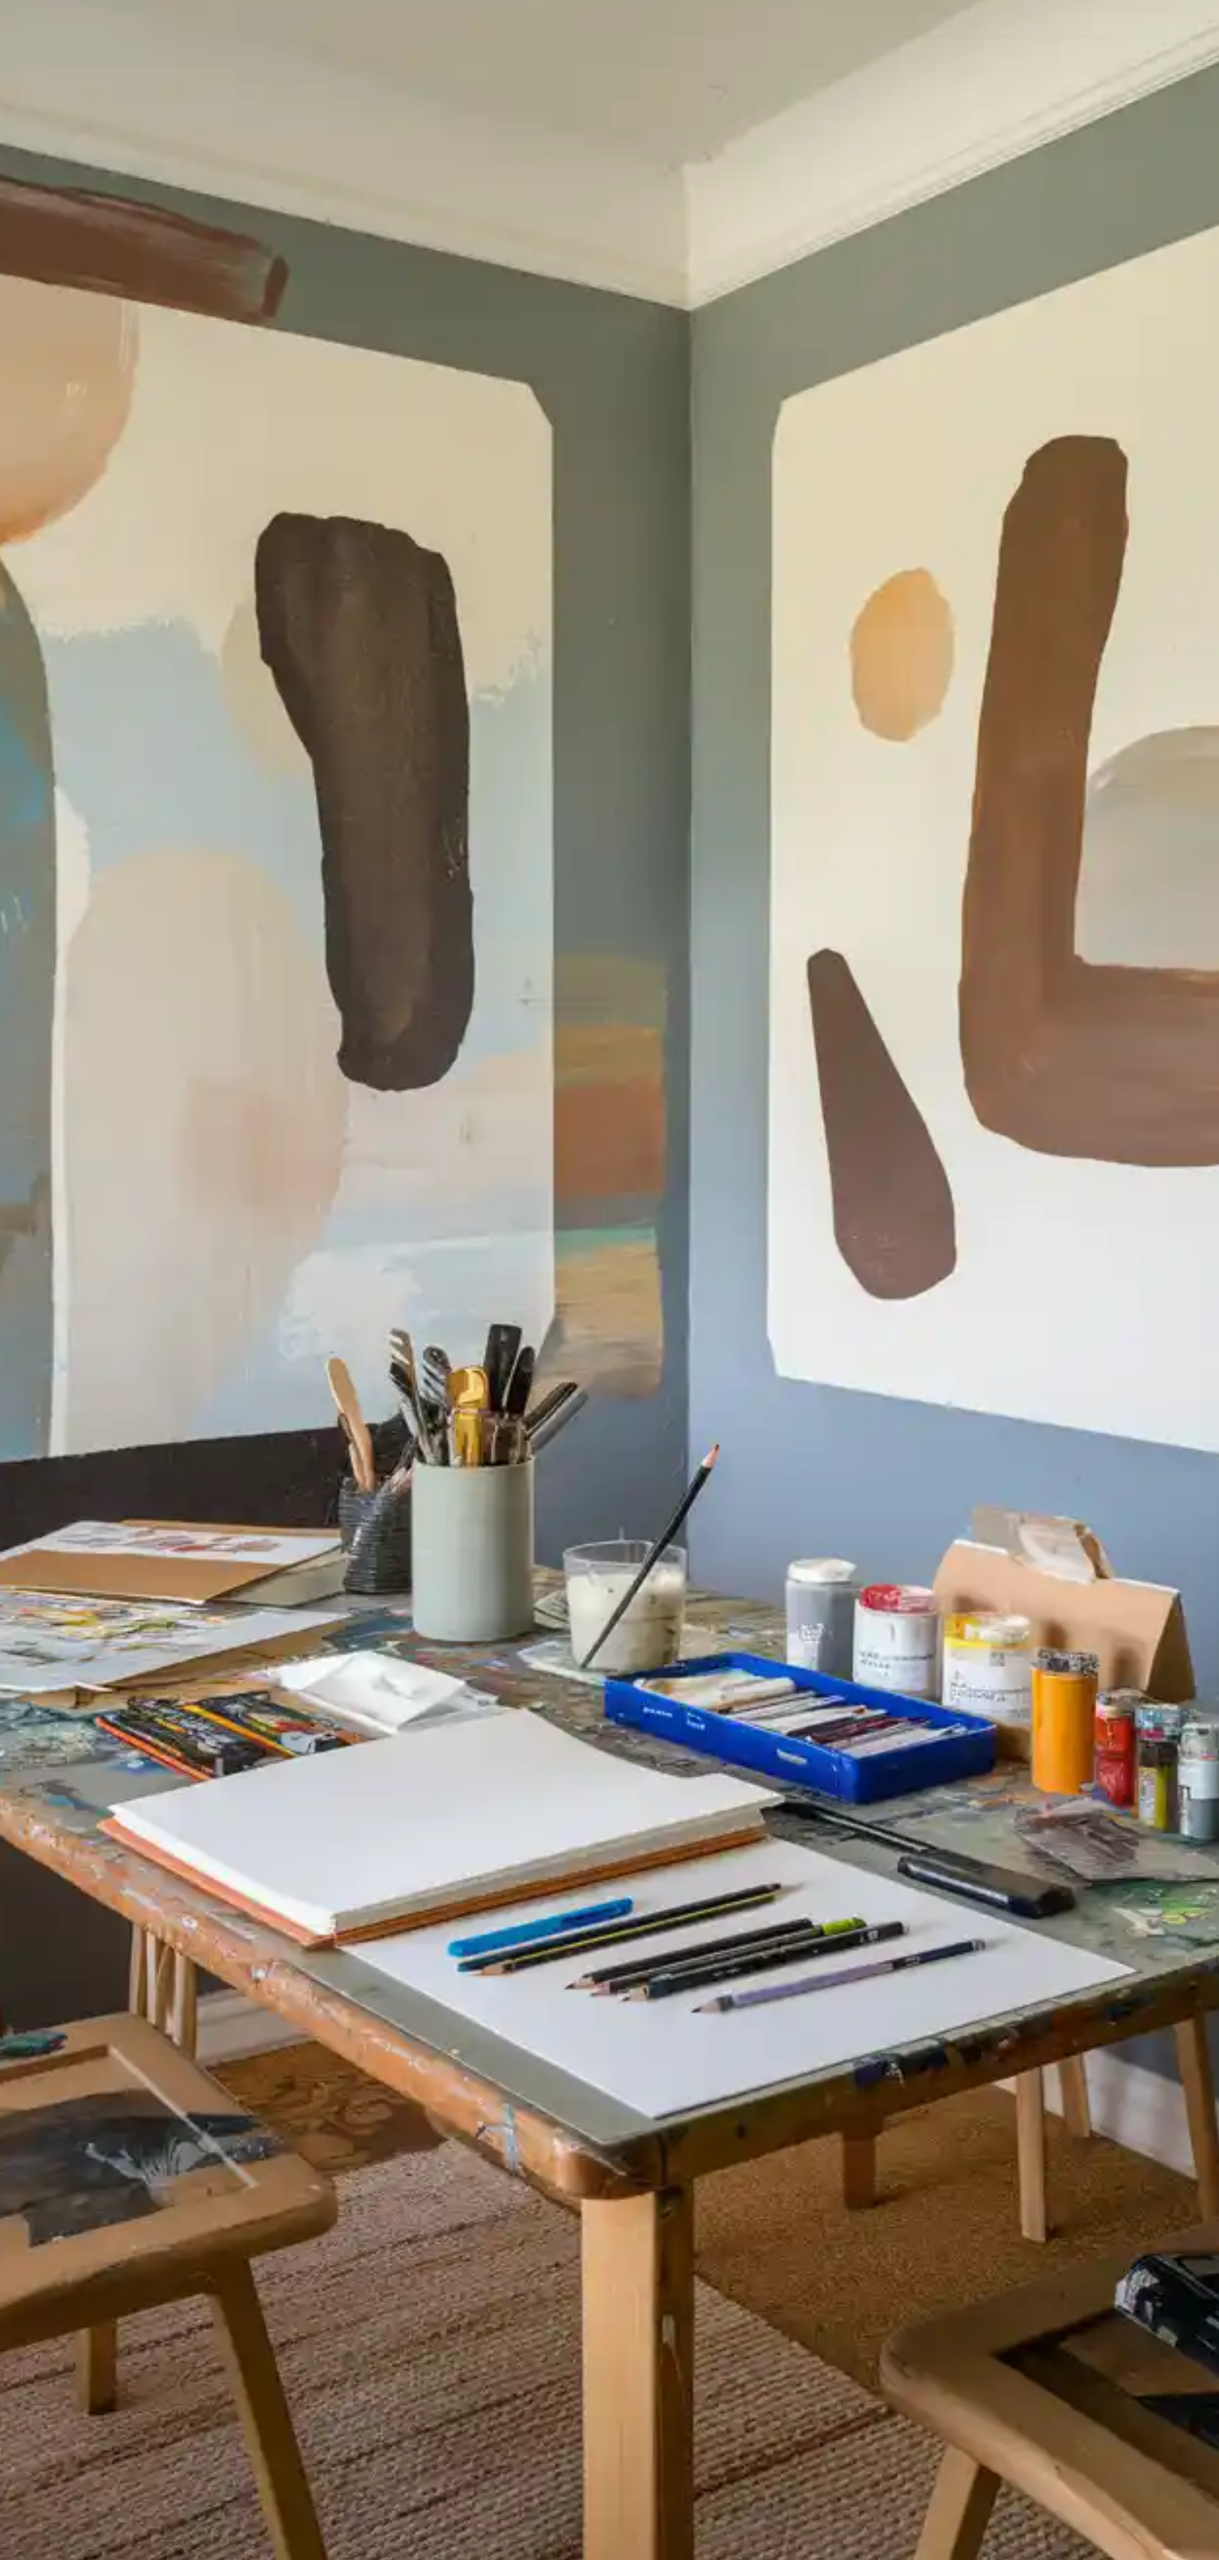
8. Set Up a Corner Art Station in a Bedroom or Office
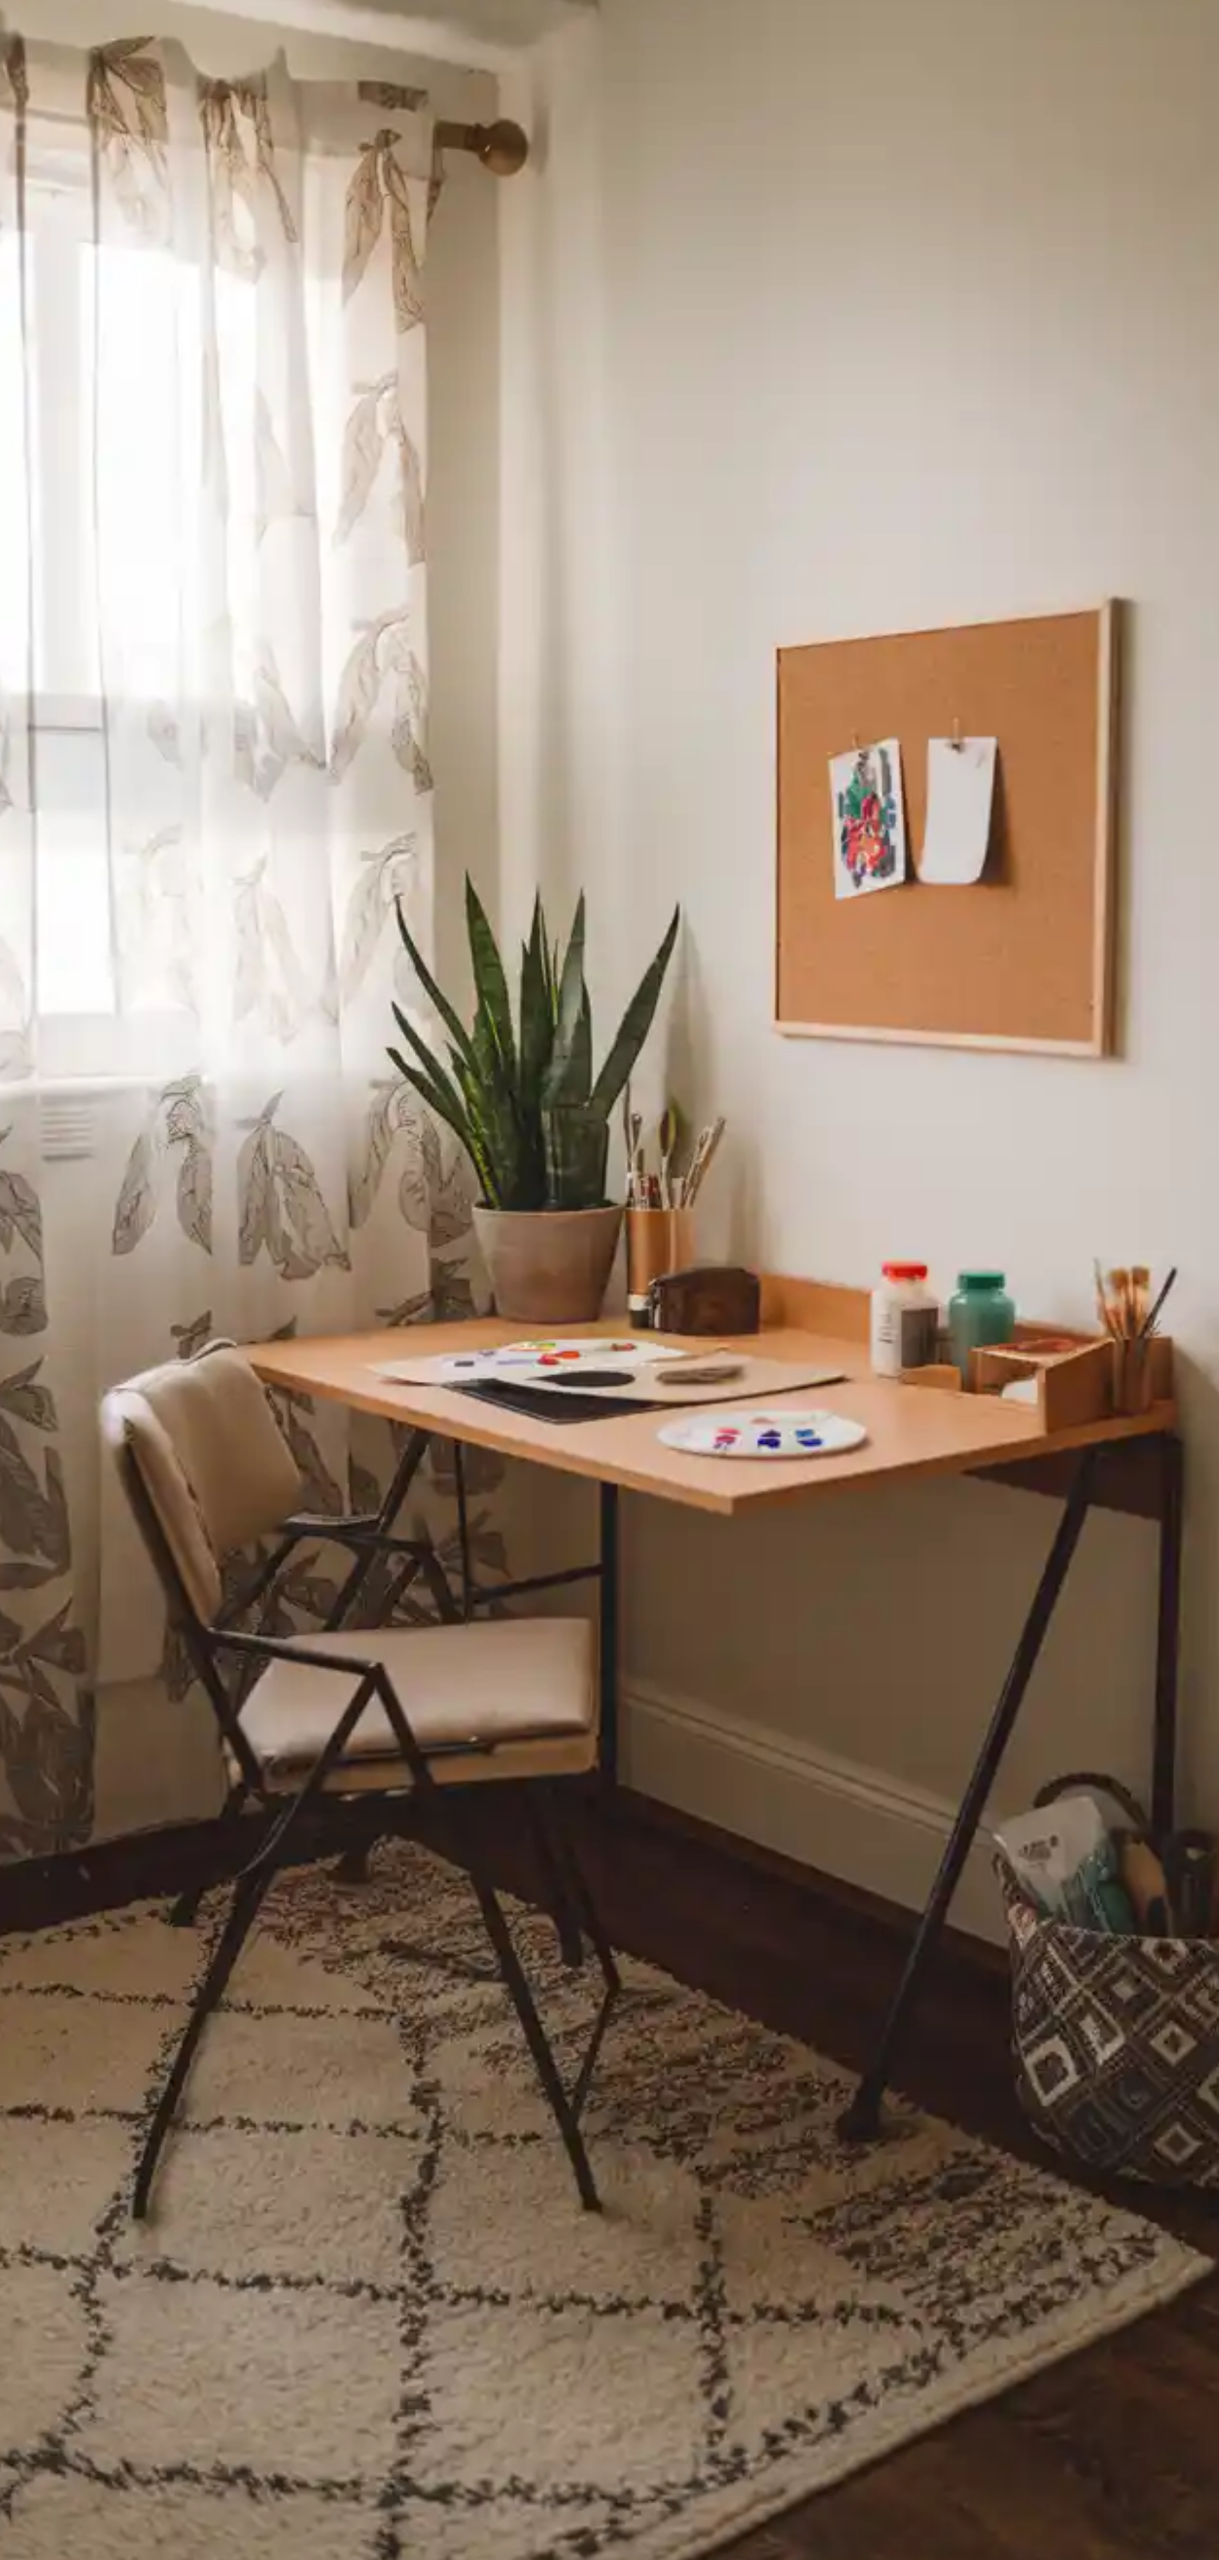
If space is limited, a corner of an existing room can still serve as a powerful creative zone.
Tips:
- Choose a corner with natural light or use a full-spectrum task lamp.
- Install floating shelves for storage above a slim desk.
- Add a magnetic board or clip rail for organizing current pieces.
- Use a high-back chair for comfort during long sessions.
7. Install a Fold-Down Wall Desk
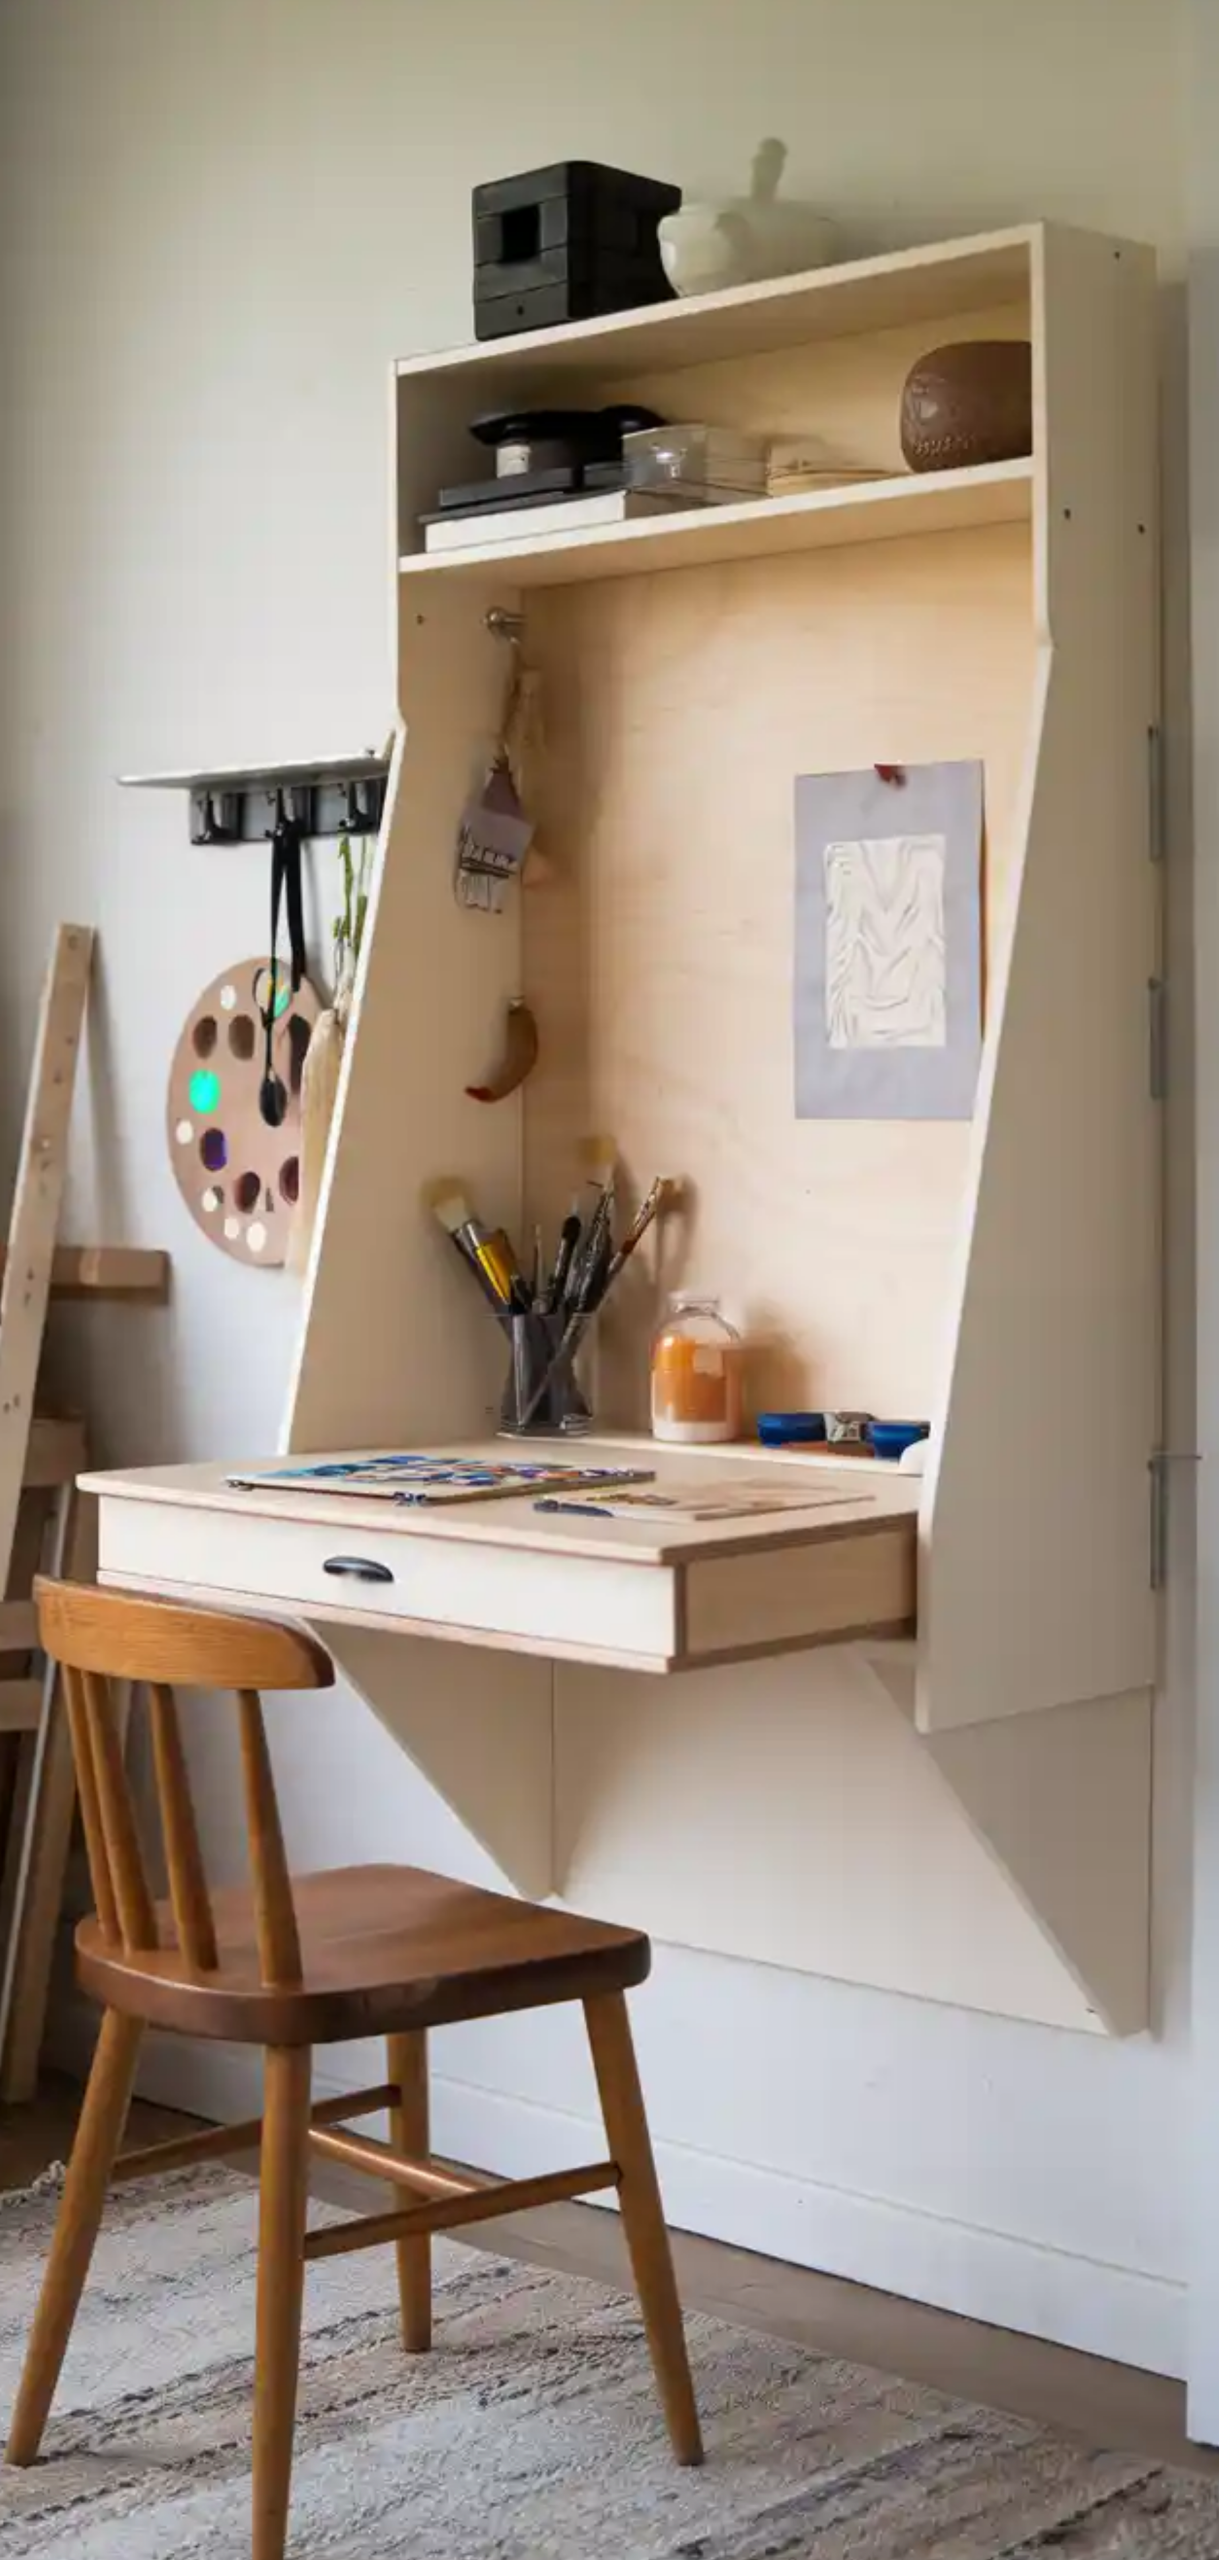
Perfect for tight apartments or studios, a wall-mounted drop-leaf desk saves space while remaining functional.
Art Studio Tips:
- Attach organizers to the underside for brushes and pencils.
- Combine with stackable storage bins nearby.
- Use the inner panel of the desk for a chalkboard or pin-up space.
6. Use a Mobile Art Cart
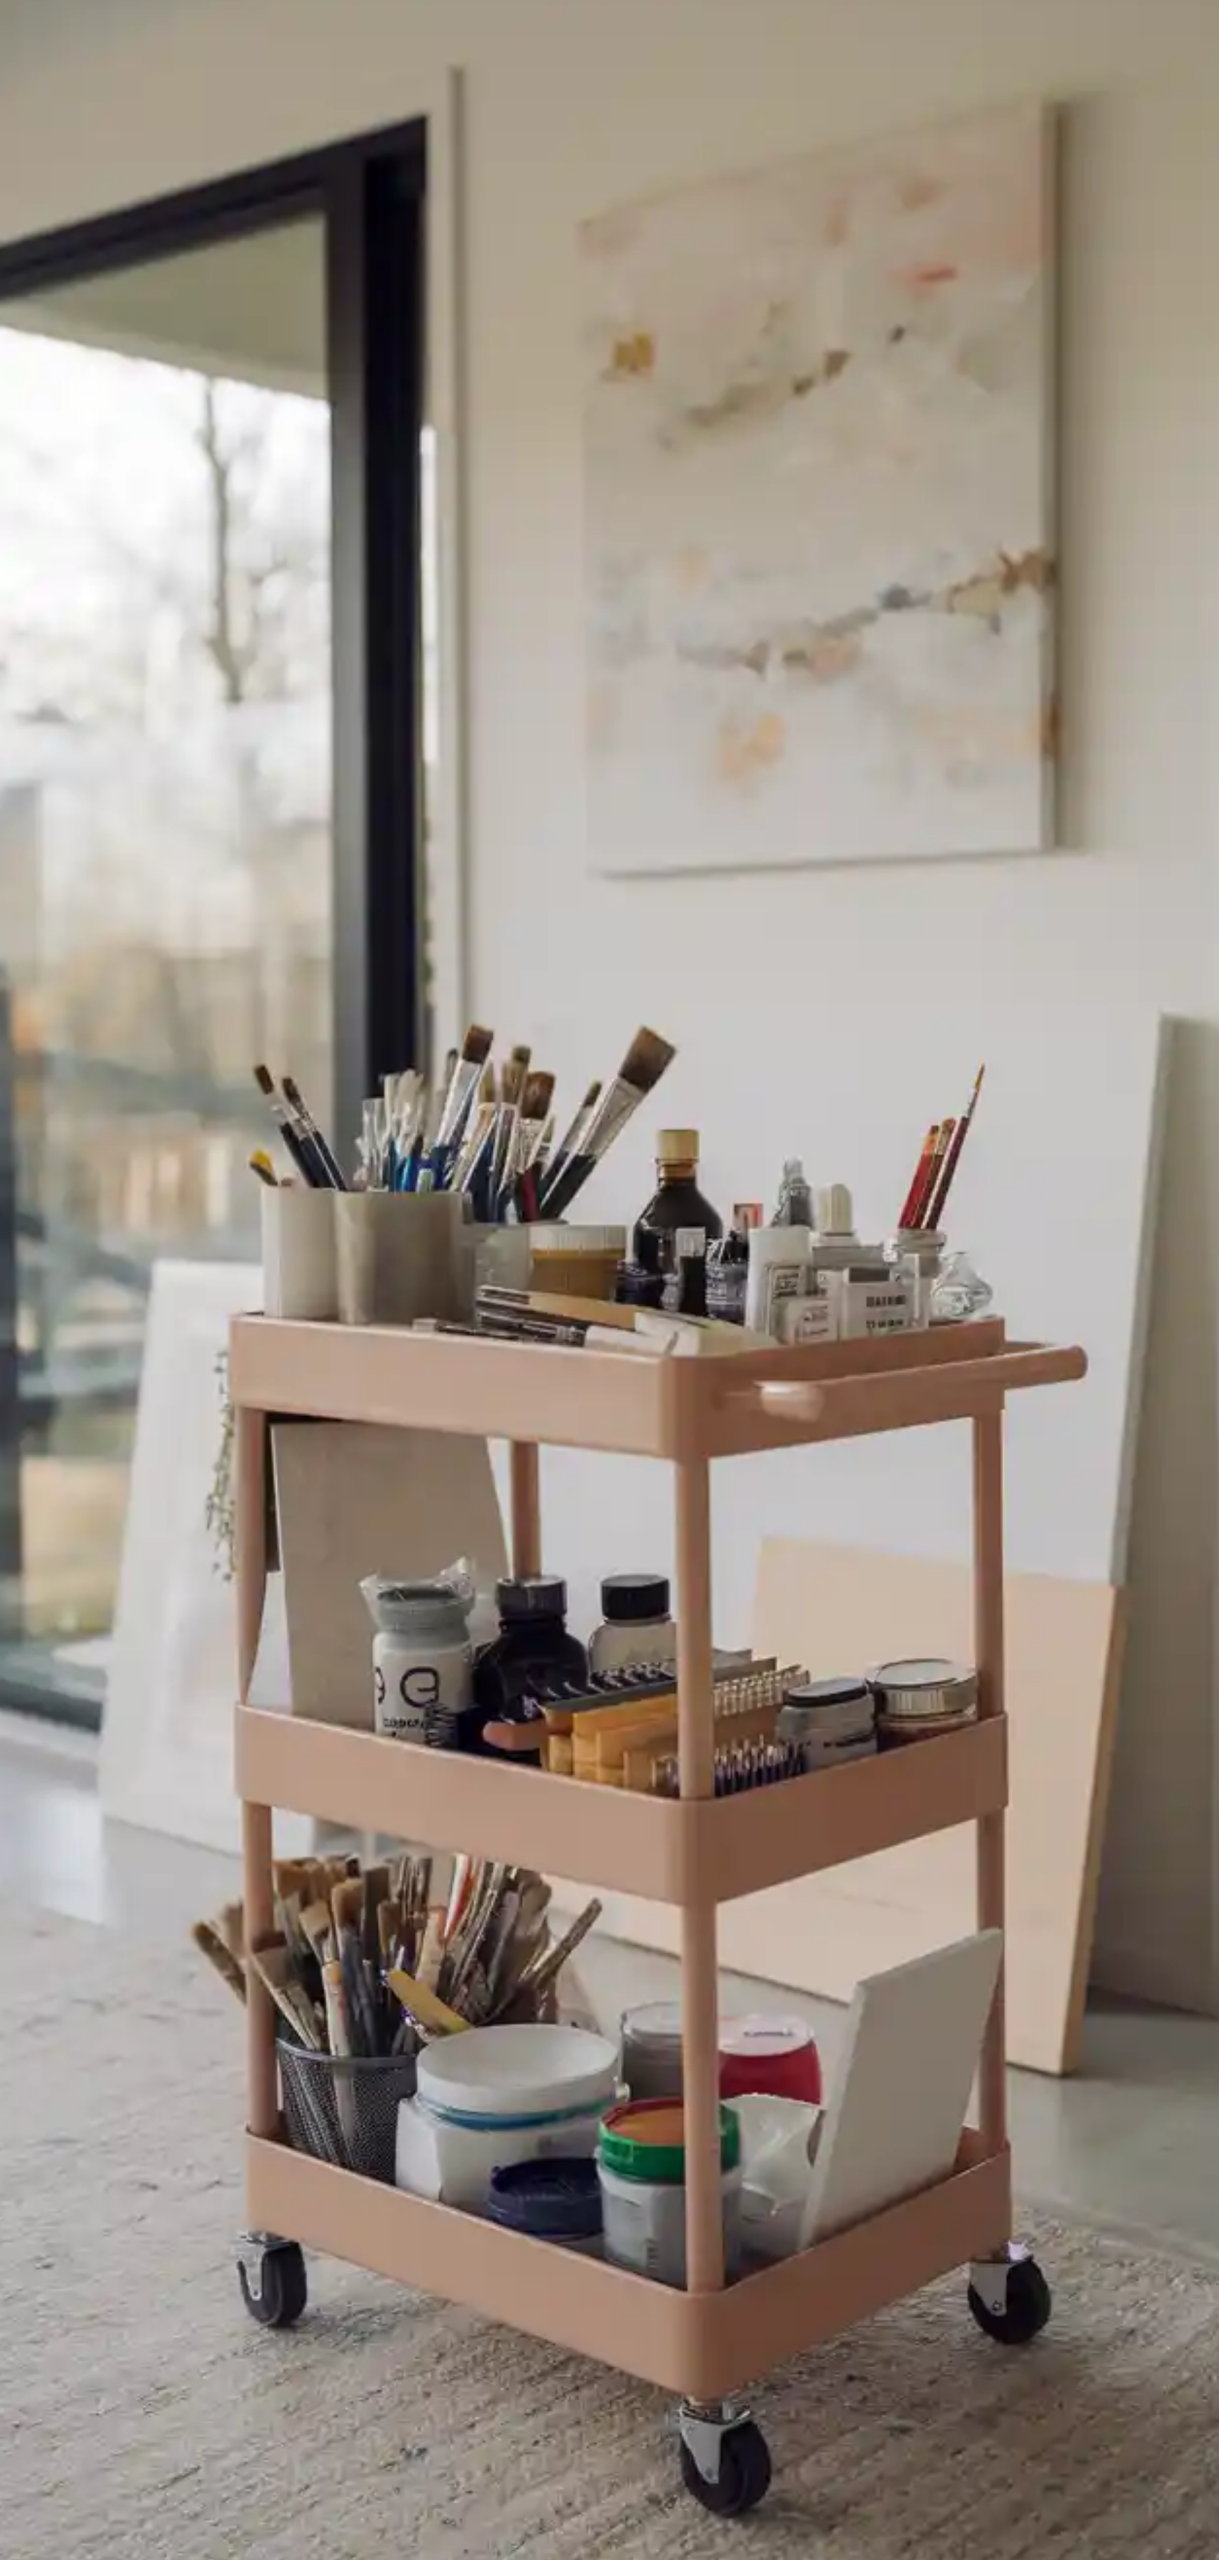
A three-tiered utility cart creates an instant, portable studio that you can roll to any room.
Art Studio Tips:
- Group supplies by type (e.g., paints, pens, tools) on separate levels.
- Add cup hooks and S-hooks on the sides for hanging scissors and rags.
- Store the cart in a closet or corner when not in use.
5. Set Up a Kitchen Table Studio
The kitchen table is often the most accessible workspace. With the right accessories, it can transform into a compact studio.
Art Studio Tips:
- Use a large self-healing cutting mat to protect the surface.
- Keep a plastic caddy nearby with only the essentials.
- Clean up quickly with washable tablecloths and collapsible bins.
4. Reuse a Sideboard or Buffet as a Supply Hub
An unused cabinet or sideboard can hold everything you need for painting, drawing, or journaling.
Art Studio Tips:
- Store sketchbooks and canvases flat in deep drawers.
- Place a lamp and a small easel on top for an instant workstation.
- Use trays to keep supplies organized and movable.
3. Store Art Supplies Under the Bed
Make use of the hidden space beneath your bed to organize and store seasonal or infrequently used materials.
Art Studio Tips:
- Use labeled, flat rolling bins.
- Vacuum-seal large paper sheets or canvases.
- Combine with a lap desk for quick, informal sketching sessions.
2. Build an Over-the-Door Art Station
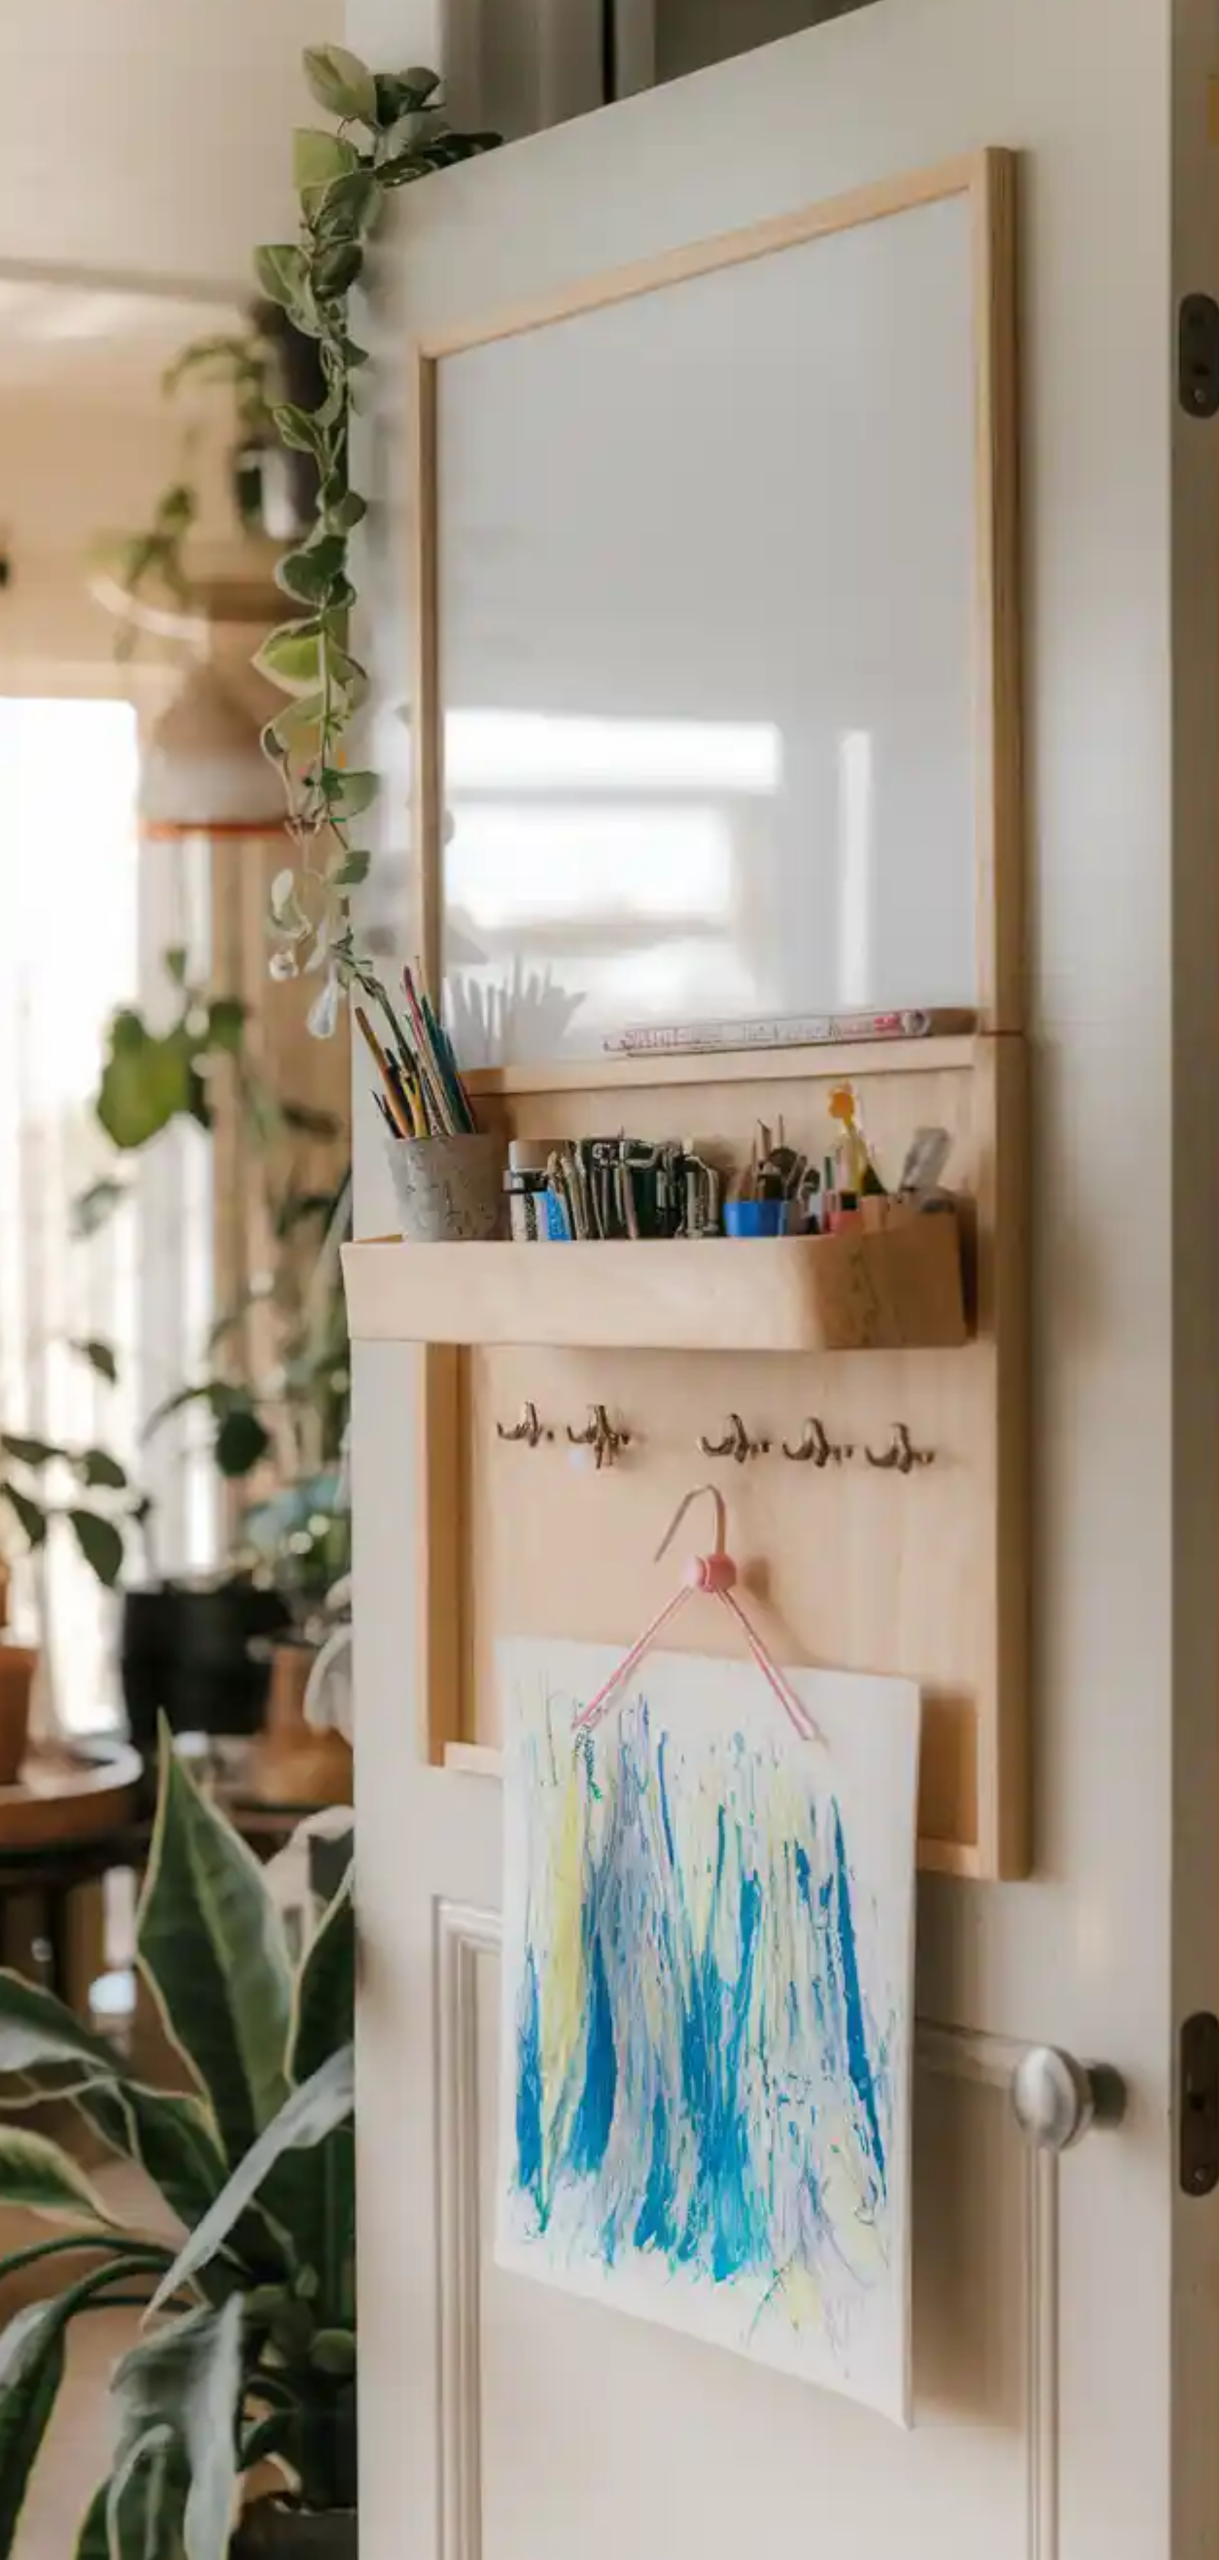
Make use of the back of a door with organizers and hanging tools.
Art Studio Tips:
- Use clear pouches for visibility.
- Install a small dry-erase board for notes and sketches.
- Hang scissors, washi tape, and smaller tools on hooks.
1. Use a Portable Art Portfolio
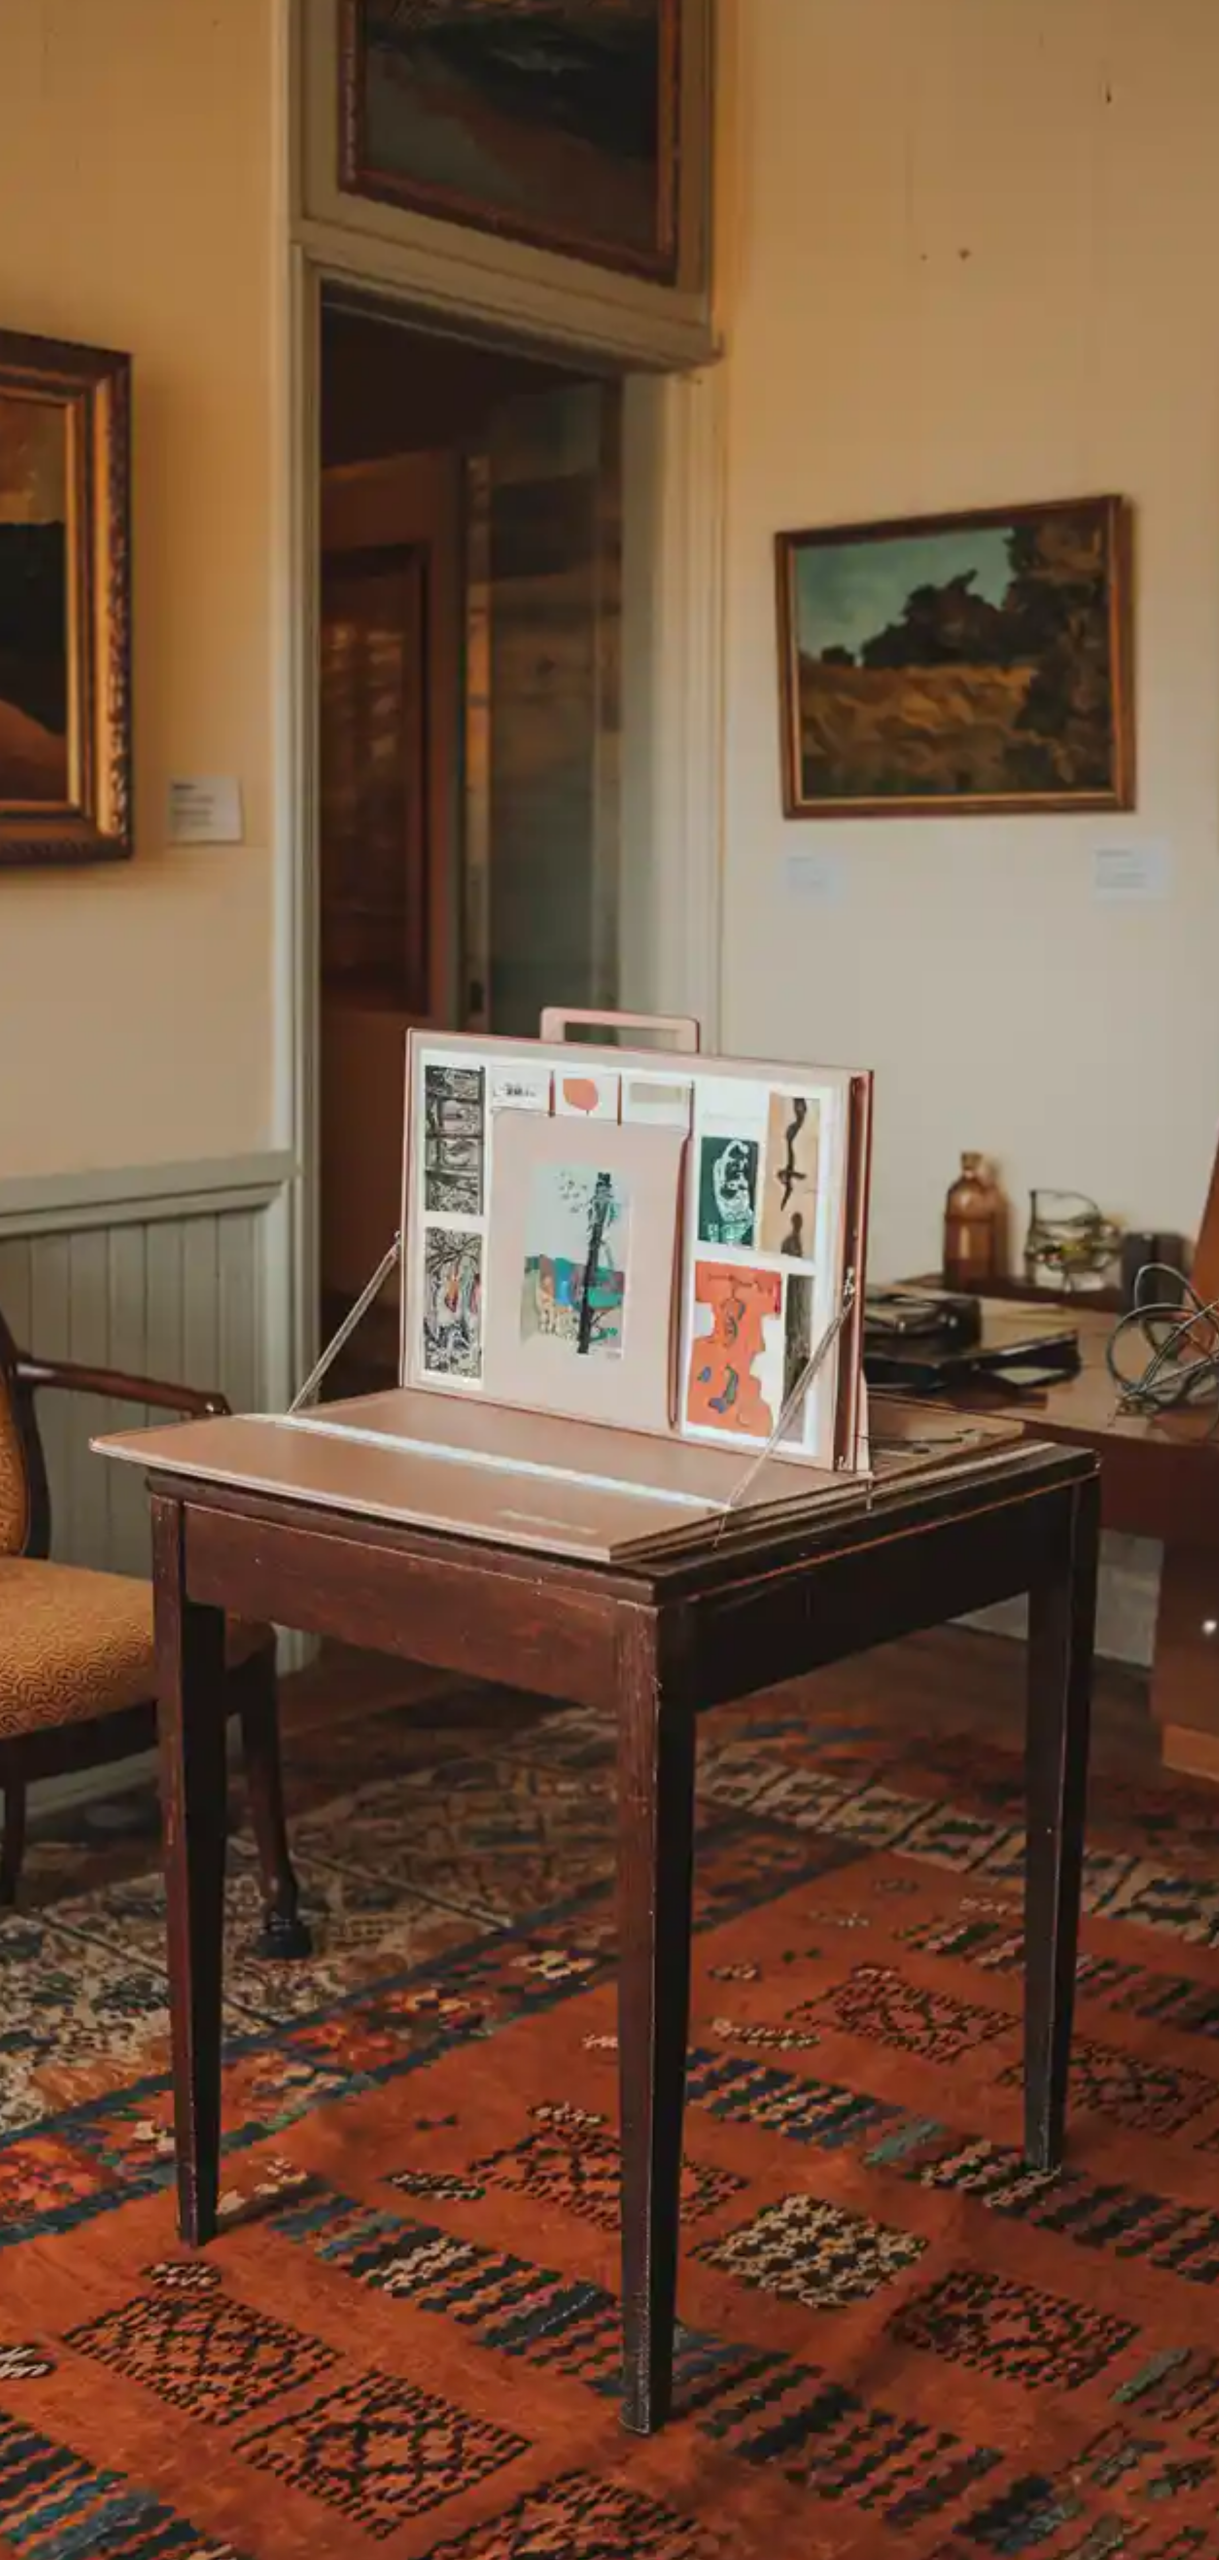
A zippered artist portfolio or case is perfect for nomadic creators.
Art Studio Tips:
- Choose one with compartments for brushes, paper, and markers.
- Set up on any flat surface, then zip and go.
- Ideal for travel, outdoor painting, or shared households.
Conclusion
By optimizing your home’s available space with any of these 14 methods, you can create an inspiring, well-organized art studio, whether you’re working with a spacious room or a small shared space.


[…] my own art home studio, I hit this wall when every drawer bulged with glitter, buttons, and half-used paper pads. My […]