Join Our Newsletter for Cozy Home Inspiration, Family Fun, and Delicious Recipes Every Week
Easy Easter Cookies
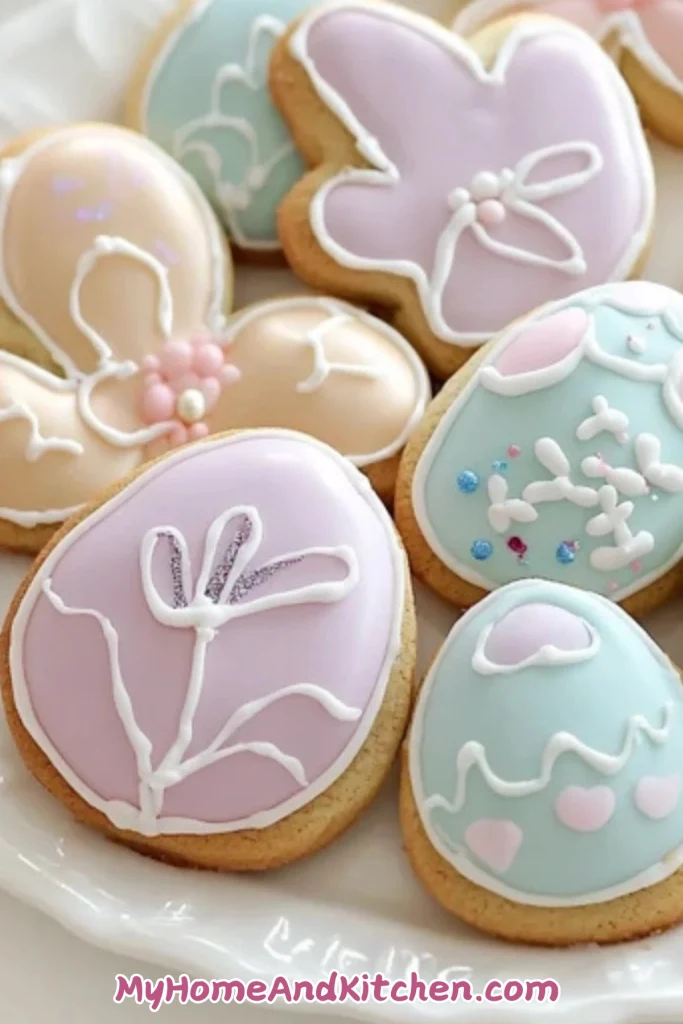
If you’re excited to kick off spring baking, these beautiful pastel Easy Easter Cookies are the perfect treat to make! These Easter egg sugar cookies are a true work of edible art.

Easter sugar cookies just saying it makes me smile! There’s something about pastel-colored icing, tiny bunny faces, and edible glitter that takes me straight back to childhood because you know the feeling. When spring is in the air, while the smell of something sweet is baking, and as an entire afternoon is spent decorating cookies although let’s be honest they might not look bakery-perfect, yet they taste absolutely amazing.
The moment I first tried making these on my own, there was flour everywhere and a suspicious amount of dough mysteriously missing. I swear, it wasn’t me! Moreover, my overambitious attempt at piping intricate floral designs ended up looking more like blobs.
Nevertheless, that’s the fun of it, right? After all, once that royal icing sets, even the wobbliest bunny face somehow turns into pure magic.
In fact, these Easter sugar cookies are buttery while also being crisp on the edges whereas they remain melt-in-your-mouth soft in the center. Above all, the best part is that decorating them is half the joy! Whether you’re making these with kids, for a party, or just for yourself zero judgment, they’re the perfect excuse to bring out your inner artist.

So, grab your cookie cutters and mix up some pastel icing in order to make a batch of cookies that scream springtime fun! And if a few cookies mysteriously disappear before they make it to the table, well… I won’t tell if you don’t!
How to Make Easter Cookies
Step One : Preheat and Prepare
Preheat your oven to 350°F (175°C). Line a baking sheet with parchment paper to prevent sticking.
Make the Dough
In a large mixing bowl, beat the butter and sugar together until light and fluffy. Add the egg, vanilla extract, and almond extract (if using). Mix until well combined.
Step Two : Combine Dry Ingredients
In a separate bowl, whisk together the flour, baking powder, and salt. Slowly add this dry mixture into the wet ingredients while stirring gently. Mix until a soft dough forms.
Step Three : Chill the Dough
Wrap the dough in plastic wrap and refrigerate for about 30 minutes. Chilling helps the dough become easier to roll and cut into shapes.
Step Four: Shape the Cookies
Lightly flour a clean surface and roll out the dough to about 1/4 inch thickness. Use cookie cutters to create Easter-themed shapes like eggs, bunnies, and flowers. Place the shaped cookies onto the prepared baking sheet.
Step Five: Bake
Bake the cookies for 8-10 minutes or until the edges turn light golden brown. Remove from the oven and let them cool on the baking sheet for 5 minutes before transferring to a wire rack.
Step Six: Make the Icing
In a small bowl, mix powdered sugar, milk, and vanilla extract until smooth. Divide the icing into separate bowls and add different food coloring to each.
Step Seven : Decorate and Enjoy
Once the cookies have cooled completely, use a small spoon or piping bag to apply icing. Decorate with sprinkles, chocolate eggs, or other festive toppings. Let the icing set for about 20 minutes before serving.

Kitchen Equipment You’ll Need
- Cookie cutters (Easter-themed shapes)
- Baking sheet
- Parchment paper
- Measuring cups and spoons
- Whisk
- Spatula
- Plastic wrap
- Rolling pin
- Wire rack
- Mixing bowls
- Hand or stand mixer
Best Tips
Don’t overbake cookies will continue to cook slightly on the baking sheet after being removed from the oven.
Use softened butter to make the dough easier to mix.
Chill the dough before rolling to prevent it from being too sticky.
For extra flavor, add a little lemon zest or cinnamon to the dough.
Get creative with decorations! Use different icing colors and toppings to make each cookie unique.
What To Eat With Easter Cookies
Easy Easter Cookies pair well with a variety of treats:
Hot chocolate or tea for a cozy snack
A scoop of vanilla ice cream for a special dessert
A glass of milk for a classic combo
Fresh fruit like strawberries or blueberries for a refreshing contrast

FAQ
How do I prevent the cookies from sticking to the rolling pin?
Lightly flour your rolling pin and work surface to keep the dough from sticking.
Can I make these cookies without chilling the dough?
Chilling helps the dough stay firm and prevents cookies from spreading too much, but you can skip it if you’re in a hurry. Just expect slightly softer cookies.
Can I freeze the cookies after decorating them?
Yes, but the icing may become slightly sticky when thawed. It’s best to freeze undecorated cookies and decorate them after thawing.

Easy Easter Cookies
Course: Dessert, SnacksCuisine: AmericanDifficulty: EasyServings
12
servingsPrep time
15
minutesCooking time
10
minutesCalories
150
kcalTotal time
25
minutesThese Easy Easter Cookies are soft, buttery, and fun to decorate! Perfect for celebrating the holiday, they can be shaped like bunnies, eggs, and flowers and topped with colorful icing and sprinkles. A great recipe to bake with kids and share with family!
Ingredients
For the Cookies:
2 1/2 cups all-purpose flour
1 cup unsalted butter, softened
3/4 cup granulated sugar
1 large egg
1 teaspoon vanilla extract
1/2 teaspoon almond extract (optional)
1/2 teaspoon salt
1 teaspoon baking powder
For the Decorations:
1 cup powdered sugar
2 tablespoons milk
1/2 teaspoon vanilla extract
Food coloring (pink, yellow, green, etc.)
Sprinkles, mini chocolate eggs, or crushed candies
Directions
- Step One : Preheat and Prepare
- Preheat your oven to 350°F (175°C). Line a baking sheet with parchment paper to prevent sticking.
- Make the Dough
- In a large mixing bowl, beat the butter and sugar together until light and fluffy. Add the egg, vanilla extract, and almond extract (if using). Mix until well combined.
- Step Two : Combine Dry Ingredients
- In a separate bowl, whisk together the flour, baking powder, and salt. Slowly add this dry mixture into the wet ingredients while stirring gently. Mix until a soft dough forms.
- Step Three : Chill the Dough
- Wrap the dough in plastic wrap and refrigerate for about 30 minutes. Chilling helps the dough become easier to roll and cut into shapes.
- Step Four: Shape the Cookies
- Lightly flour a clean surface and roll out the dough to about 1/4 inch thickness. Use cookie cutters to create Easter-themed shapes like eggs, bunnies, and flowers. Place the shaped cookies onto the prepared baking sheet.
- Step Five: Bake
- Bake the cookies for 8-10 minutes or until the edges turn light golden brown. Remove from the oven and let them cool on the baking sheet for 5 minutes before transferring to a wire rack.
- Step Six: Make the Icing
- In a small bowl, mix powdered sugar, milk, and vanilla extract until smooth. Divide the icing into separate bowls and add different food coloring to each.
- Step Seven : Decorate and Enjoy
- Once the cookies have cooled completely, use a small spoon or piping bag to apply icing. Decorate with sprinkles, chocolate eggs, or other festive toppings. Let the icing set for about 20 minutes before serving.
Notes
- Chill the Dough: Refrigerating the dough for at least 30 minutes helps make it easier to roll out and prevents the cookies from spreading too much while baking.
- Even Thickness: Roll out the dough to an even 1/4-inch thickness to ensure the cookies bake uniformly.
- Make Ahead Tip: You can prepare the dough a day in advance and refrigerate it overnight to save time on baking day.
- Experiment with Flavors: Add a little lemon zest, cinnamon, or nutmeg to the dough for a unique twist.
- Let Cookies Cool Before Decorating: Warm cookies will cause icing to melt and run off. Let them cool completely on a wire rack before decorating.