Our kitchen is where the delicious magic unfolds. I’m all about simple recipes and sharing them with our online pals
12 Valentine’s Day Sweets to Melt Your Partner’s Heart
Valentine’s Day is just around the corner, and what better way to celebrate than with a spread of adorable, sweet treats? Whether you’re hosting a cozy night in, prepping for a classroom party, or just want to bake something festive, these recipes have you covered.
Each of these desserts is packed with love and guaranteed to impress your Valentine. Ready to dive in? Let’s bake some magic!
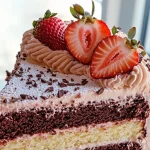
Recipe 1 : Strawberry Cheesecake Cookie Cups Recipe
Buttery cookie cups filled with creamy cheesecake and topped with sweet strawberry jam and fresh berries. These are almost too cute to eat but who are we kidding?

Ingredients:
For the cookie cups:
1/2 cup (115g) unsalted butter, softened
1/2 cup (100g) granulated sugar
1/4 cup (50g) brown sugar, packed
1 large egg
1 teaspoon vanilla extract
1 1/4 cups (155g) all-purpose flour
1/2 teaspoon baking soda
1/4 teaspoon salt
For the cheesecake filling:
8 oz (226g) cream cheese, softened
1/4 cup (60ml) heavy cream
1/3 cup (40g) powdered sugar
1/2 teaspoon vanilla extract
For the topping:
1/2 cup (120g) strawberry jam
Fresh strawberries, diced
Powdered sugar (for dusting)
Instructions:
Prepare the Cookie Cups:
Preheat your oven to 350°F (175°C) and lightly grease a muffin tin.
In a mixing bowl, cream together the butter, granulated sugar, and brown sugar until fluffy.
Beat in the egg and vanilla extract until well combined.
In a separate bowl, whisk together the flour, baking soda, and salt. Gradually add the dry ingredients to the wet ingredients and mix until a soft dough forms.
Scoop 1.5 tablespoons of dough into each muffin cup and press it into the bottom and slightly up the sides to form a cup shape.
Bake:
Bake for 10–12 minutes, or until the edges are golden. The centers will puff up during baking but sink slightly as they cool.
Let the cookie cups cool completely in the pan, then gently remove them.
Prepare the Cheesecake Filling:
In a bowl, beat the softened cream cheese until smooth.
Add the heavy cream, powdered sugar, and vanilla extract, whipping until light and fluffy.
Assemble the Cookie Cups:
Fill each cooled cookie cup with a dollop of the cheesecake filling.
Top with a spoonful of strawberry jam and a few pieces of diced fresh strawberries.
Decorate:
Dust the edges of the cookie cups with powdered sugar for an elegant finish.
Decoration Tips:
Glossy Finish: Warm the strawberry jam slightly before topping for a shiny, professional look.
Elegant Touch: Add a small mint leaf on top for a pop of color.
Custom Variations: Use different jams or fresh fruit like raspberries or blueberries for a unique twist.
These Strawberry Cheesecake Cookie Cups are the perfect blend of buttery cookies, creamy cheesecake, and fresh strawberries, making them a crowd-pleaser for any occasion. Enjoy!
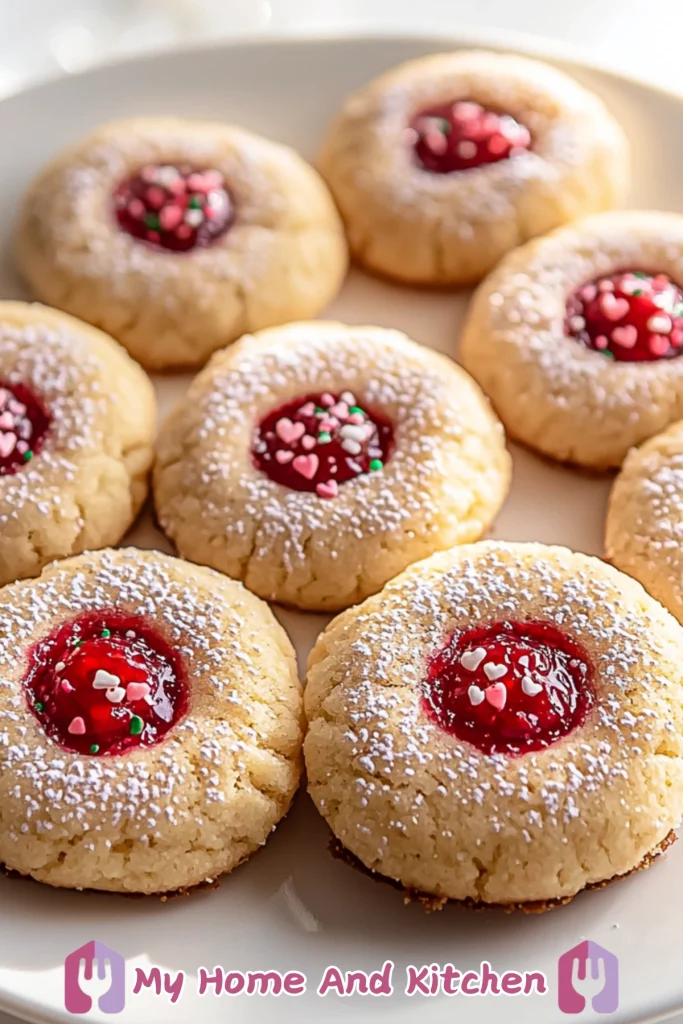
Recipe 2 : Cupid’s Raspberry Thumbprint Cookies Recipe
These buttery cookies are filled with tangy raspberry jam and decorated with heart-shaped sprinkles perfect for sharing!
Ingredients:
For the cookies:
1 cup (226g) unsalted butter, softened
2/3 cup (135g) granulated sugar
2 egg yolks
1 teaspoon vanilla extract
2 1/4 cups (280g) all-purpose flour
1/4 teaspoon salt
For the filling:
1/3 cup (about 100g) raspberry jam (or your favorite jam)
Optional Topping:
Powdered sugar (for dusting)
Decorations:
Heart-shaped sprinkles or confetti sprinkles
Instructions:
Prepare the Dough:
Preheat your oven to 350°F (175°C) and line a baking sheet with parchment paper.
In a large bowl, cream together the softened butter and granulated sugar until light and fluffy.
Add the egg yolks and vanilla extract, mixing until well combined.
Gradually add in the flour and salt, mixing until a soft dough forms.
Shape the Cookies:
Roll the dough into 1-inch balls and place them 2 inches apart on the prepared baking sheet.
Use your thumb (or the back of a teaspoon) to gently press a small indentation into the center of each ball.
Add the Filling:
Fill each indentation with about 1/2 teaspoon of raspberry jam.
Bake:
Bake the cookies in the preheated oven for 12–15 minutes or until the edges are lightly golden.
Allow the cookies to cool on the baking sheet for 5 minutes before transferring them to a wire rack to cool completely.
Decorate:
Once cooled, dust the cookies with powdered sugar for a snowy effect.
Add heart-shaped sprinkles directly on the jam-filled center for a cute, festive touch.
Decoration Tips:
Heart-shaped sprinkles: To make the cookies Valentine-themed, carefully place heart-shaped sprinkles on the jam while it’s still warm so they stick.
Color coordination: Use red or pink sprinkles for a cohesive and romantic look.
Dusting: A light dusting of powdered sugar around the edges makes the cookies pop visually and adds sweetness.
Jam variety: You can switch up the jam to use strawberry, apricot, or even chocolate spread to addvariety.
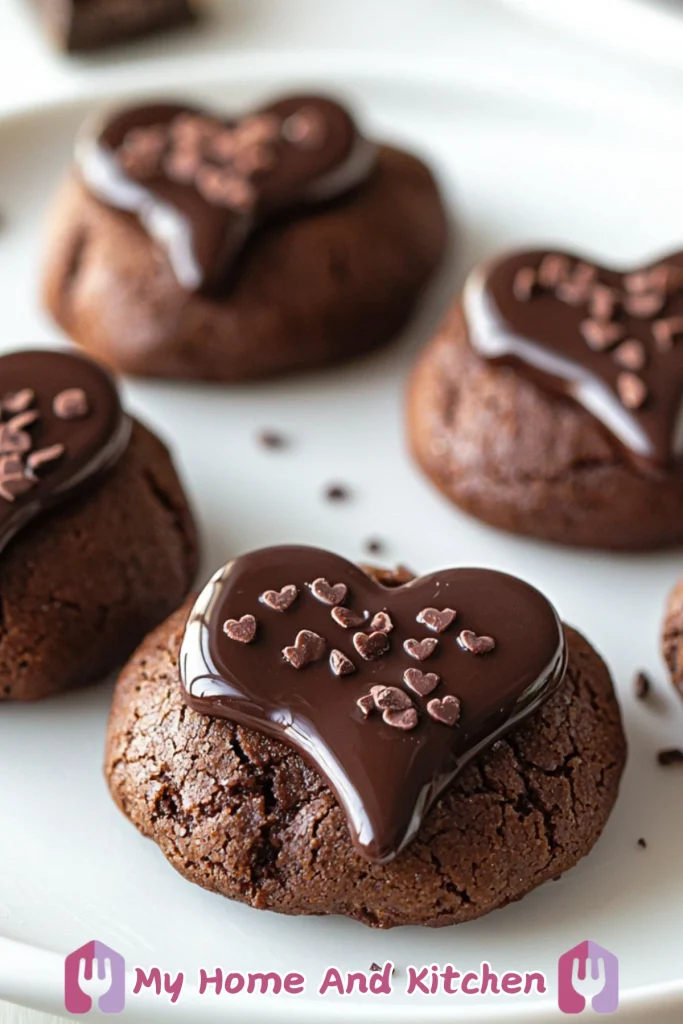
Recipe 3 : Double Chocolate Love Bites Recipe
Rich chocolate cookies topped with glossy chocolate ganache and tiny heart sprinkles. These are almost too romantic to eat.
Ingredients:
For the cookies:
1 cup (226g) unsalted butter, softened
1 cup (200g) granulated sugar
1/2 cup (100g) packed brown sugar
2 large eggs
2 teaspoons vanilla extract
1 3/4 cups (220g) all-purpose flour
3/4 cup (70g) unsweetened cocoa powder
1 teaspoon baking soda
1/2 teaspoon salt
1 cup (175g) chocolate chips or chunks
For the topping:
6 ounces (170g) semi-sweet chocolate (melted)
Heart-shaped chocolate sprinkles
Instructions:
Prepare the Dough:
Preheat your oven to 350°F (175°C) and line a baking sheet with parchment paper.
In a large bowl, cream together the softened butter, granulated sugar, and brown sugar until smooth and fluffy.
Add eggs one at a time, mixing well after each addition. Stir in the vanilla extract.
In a separate bowl, sift together the flour, cocoa powder, baking soda, and salt. Gradually mix the dry ingredients into the wet ingredients.
Fold in the chocolate chips or chunks.
Shape the Cookies:
Scoop about 1.5 tablespoons of dough and roll into balls. Place them 2 inches apart on the baking sheet.
Use your thumb or a small spoon to gently flatten the top of each cookie to create a small dip.
Bake:
Bake the cookies for 10–12 minutes or until set around the edges. The centers will remain slightly soft.
Let the cookies cool on the baking sheet for 5 minutes before transferring them to a wire rack.
Add the Topping:
Once the cookies are completely cooled, melt the semi-sweet chocolate using a microwave or double boiler.
Using a small spoon or piping bag, spread or pipe the melted chocolate into a heart shape on each cookie.
While the chocolate is still wet, sprinkle heart-shaped chocolate sprinkles on top.
Let Set:
Allow the chocolate topping to set at room temperature or speed it up by refrigerating the cookies for 10–15 minutes.
Decoration Tips:
Heart Shapes: To create precise heart shapes, use a heart-shaped mold or gently guide the melted chocolate with a toothpick.
Sprinkle Placement: Sprinkle the decorations right after piping the chocolate to ensure they stick.
Double Chocolate Effect: For a more dramatic look, drizzle white chocolate over the dark chocolate once it sets.
These cookies are rich, fudgy, and perfect for celebrating love or any special occasion! Enjoy!
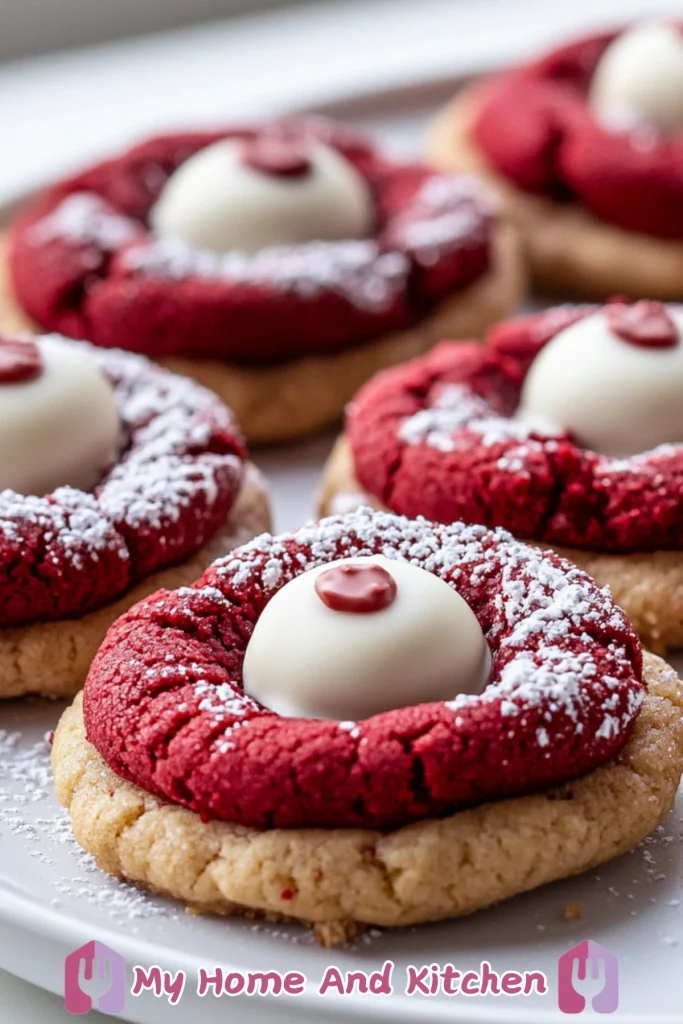
Recipe 4 : Heartfelt Red Velvet Kiss Cookies Recipe
These soft red velvet cookies are topped with white chocolate truffles. A decadent and show-stopping dessert!
Ingredients:
For the cookies:
1/2 cup (115g) unsalted butter, softened
3/4 cup (150g) granulated sugar
1 large egg
1 teaspoon vanilla extract
1 teaspoon red food coloring (gel works best)
1 1/3 cups (170g) all-purpose flour
1/4 cup (20g) unsweetened cocoa powder
1/2 teaspoon baking soda
1/4 teaspoon salt
For the topping:
White chocolate kisses or white chocolate truffles
Powdered sugar (for dusting)
Instructions:
Prepare the Dough:
Preheat your oven to 350°F (175°C) and line a baking sheet with parchment paper.
In a large mixing bowl, cream together the butter and granulated sugar until light and fluffy.
Mix in the egg, vanilla extract, and red food coloring until evenly combined.
In a separate bowl, whisk together the flour, cocoa powder, baking soda, and salt.
Gradually add the dry ingredients to the wet ingredients and mix until a soft dough forms.
Shape the Cookies:
Scoop about 1 tablespoon of dough and roll into a ball. Flatten the top slightly with your palm and place them 2 inches apart on the baking sheet.
Bake:
Bake for 10–12 minutes, or until the edges are set and the tops look slightly cracked.
Let the cookies cool on the baking sheet for 5 minutes, then transfer them to a wire rack.
Add the Topping:
Once the cookies are completely cooled, press a white chocolate kiss or truffle gently into the center of each cookie.
Decorate Tips :
Dust the cookies with powdered sugar for a snowy, elegant finish. Use a fine sieve for an even dusting.
Decoration Tips:
Topping Variation: Swap white chocolate kisses with cream cheese frosting swirls for a classic red velvet pairing.
Presentation: Place cookies in decorative liners or arrange them on a platter with contrasting colors to make them pop.
Extra Sparkle: Add edible glitter or small sprinkles around the edges of the white chocolate for a festive touch.
These cookies are perfect for special occasions like Valentine’s Day or any time you want to impress with a pop of color and flavor! Enjoy baking!
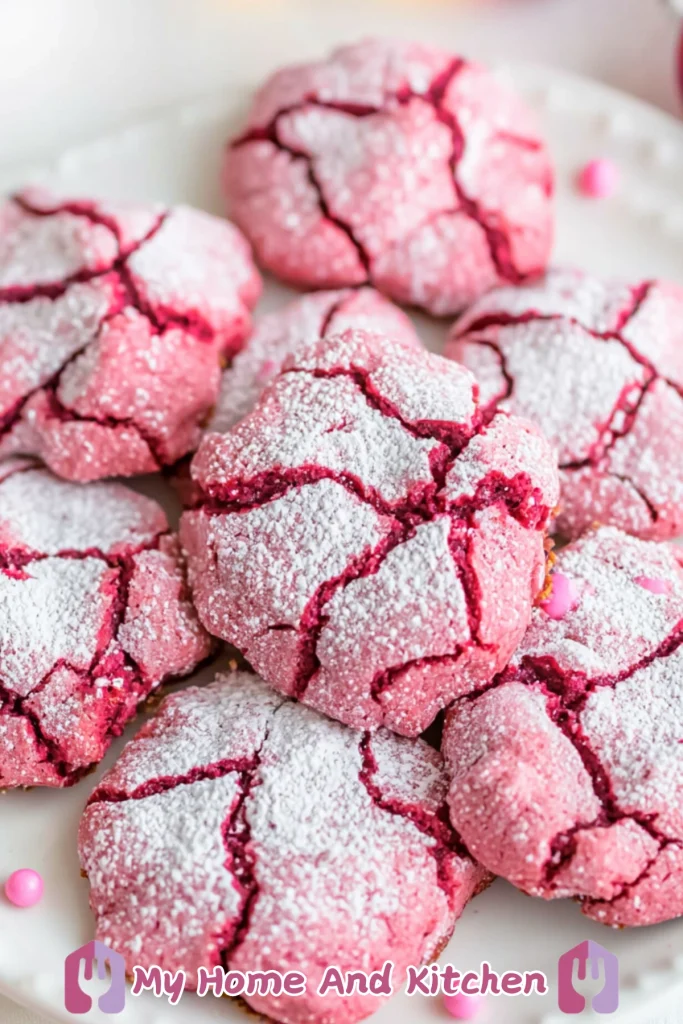
Recipe 5 : Pink Velvet Crinkle Cookies Recipe
These crackly, powdered sugar-coated cookies are soft, sweet, and totally on theme for Valentine’s Day.
Ingredients:
For the cookies:
1/2 cup (115g) unsalted butter, softened
1 cup (200g) granulated sugar
2 large eggs
1 teaspoon vanilla extract
1 teaspoon pink food coloring (gel works best)
1 3/4 cups (220g) all-purpose flour
1/4 cup (20g) unsweetened cocoa powder
1 teaspoon baking powder
1/4 teaspoon salt
For the coating:
1/2 cup (100g) granulated sugar
3/4 cup (90g) powdered sugar
Instructions:
Prepare the Dough:
In a large bowl, cream together the butter and granulated sugar until light and fluffy.
Add the eggs, one at a time, mixing well after each addition. Stir in the vanilla extract and pink food coloring until evenly distributed.
In a separate bowl, whisk together the flour, cocoa powder, baking powder, and salt.
Gradually add the dry ingredients to the wet ingredients, mixing until combined.
Cover the dough with plastic wrap and refrigerate for at least 1 hour or until firm.
Shape the Cookies:
Preheat your oven to 350°F (175°C) and line a baking sheet with parchment paper.
Scoop 1 tablespoon of chilled dough and roll it into a ball.
Roll each ball first in granulated sugar, then in powdered sugar, ensuring an even coat.
Bake:
Place the coated dough balls 2 inches apart on the prepared baking sheet.
Bake for 10–12 minutes, or until the cookies are puffed and the cracks are well-defined.
Allow the cookies to cool on the baking sheet for 5 minutes, then transfer them to a wire rack to cool completely.
Decoration Tips:
Extra Pop: Add edible glitter to the powdered sugar for a sparkling effect.
Color Variations: For different themes, experiment with different food colorings (e.g., red, purple, or blue).
Festive Touch: Surround the cookies with decorative candies or sprinkles when plating them for special occasions.
These cookies are soft, chewy, and perfect for festive gatherings, especially for Valentine’s Day or baby showers! Enjoy baking!
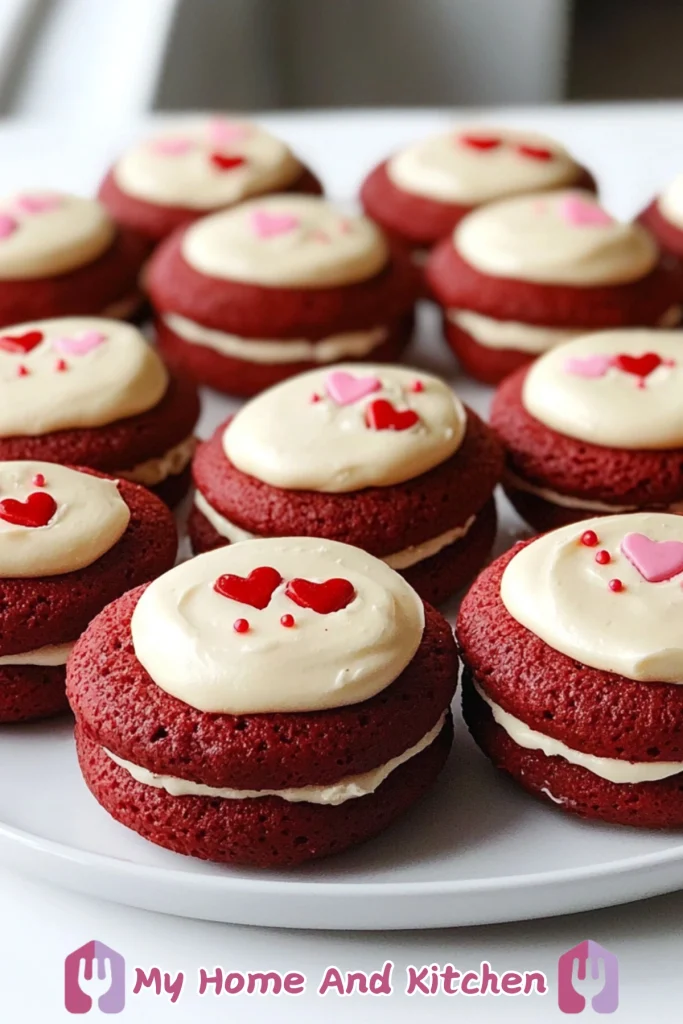
Recipe 6 : Romantic Red Velvet Whoopie Pies Recipe
Soft and chewy red velvet cookies sandwiched with a creamy, tangy cream cheese filling. These little bites are as festive as they are delicious!
Ingredients:
For the whoopie pies:
1/2 cup (115g) unsalted butter, softened
1 cup (200g) granulated sugar
1 large egg
1 teaspoon vanilla extract
1 teaspoon red gel food coloring
2 cups (250g) all-purpose flour
3 tablespoons unsweetened cocoa powder
1 teaspoon baking soda
1/4 teaspoon salt
1/2 cup (120ml) buttermilk
For the cream cheese filling:
8 oz (226g) cream cheese, softened
1/4 cup (57g) unsalted butter, softened
2 cups (250g) powdered sugar
1 teaspoon vanilla extract
For decoration:
Heart-shaped sprinkles Red and pink icing gel (optional)
Instructions:
Prepare the Whoopie Pies:
Preheat your oven to 350°F (175°C) and line baking sheets with parchment paper.
In a large bowl, cream together the butter and granulated sugar until light and fluffy.
Add the egg, vanilla extract, and red food coloring, mixing well until combined.
In a separate bowl, whisk together the flour, cocoa powder, baking soda, and salt.
Add the dry ingredients to the wet mixture in thirds, alternating with the buttermilk, and mix until smooth.
Shape and Bake:
Use a small cookie scoop or tablespoon to drop rounded spoonfuls of batter onto the prepared baking sheets, spacing them about 2 inches apart.
Bake for 8–10 minutes, or until the tops spring back when lightly touched.
Let the whoopie pies cool on the baking sheets for 5 minutes before transferring to a wire rack.
Make the Filling:
In a mixing bowl, beat the softened cream cheese and butter until smooth and creamy.
Gradually add the powdered sugar and vanilla extract, beating until fluffy.
Assemble the Whoopie Pies:
Spread or pipe a generous amount of cream cheese filling onto the flat side of half the whoopie pies.
Top with the remaining pies to form sandwiches.
Decorate:
Pipe or spread a small amount of leftover cream cheese filling on top of each assembled whoopie pie.
Add heart-shaped sprinkles, and use red or pink icing gel to draw small hearts or designs.
Decoration Tips:
Festive Hearts: Use heart-shaped piping molds or stencils to ensure uniform decorations on top.
Custom Designs: Personalize with names or initials using icing gel for a romantic touch.
Glitter Finish: Dust with edible glitter for an elegant, eye-catching look.
These charming whoopie pies are perfect for Valentine’s Day or special celebrations. They’re a sweet way to say “I love you”!
Recipe 7 : Rosewater Glazed Butter Cookies Recipe
These delicate cookies are lightly flavored with rosewater and topped with a pastel pink glaze, making them perfect for a classy Valentine’s Day treat.

Ingredients:
For the cookies:
1 cup (226g) unsalted butter, softened
1/2 cup (100g) granulated sugar
1 large egg
1 teaspoon vanilla extract
2 1/4 cups (280g) all-purpose flour
1/4 teaspoon salt
For the glaze:
1 cup (120g) powdered sugar
2–3 tablespoons milk
1 teaspoon rosewater
A drop of pink gel food coloring (optional)
For decoration:
Edible dried rose petals or edible flowers
Sparkling sugar or edible glitter (optional)
Instructions:
Prepare the Dough:
Preheat your oven to 350°F (175°C) and line a baking sheet with parchment paper.
In a large mixing bowl, cream the softened butter and granulated sugar until light and fluffy.
Mix in the egg and vanilla extract until fully incorporated.
Gradually add the flour and salt, mixing until a soft dough forms.
Shape and Bake:
Scoop 1 tablespoon of dough and roll into a ball. Flatten slightly with the palm of your hand and place 2 inches apart on the prepared baking sheet.
Bake for 10–12 minutes, or until the edges are just golden. Cool completely on a wire rack.
Prepare the Glaze:
In a small bowl, whisk together powdered sugar, milk, rosewater, and a drop of pink food coloring (if using) until smooth. The glaze should be slightly thick but spreadable.
Glaze the Cookies:
Spoon a small amount of glaze onto each cooled cookie, letting it drip slightly over the edges.
While the glaze is still wet, carefully place edible rose petals on top as decoration.
Let Set:
Allow the glaze to set at room temperature for about 20–30 minutes before serving or storing.
Decoration Tips:
Rose Petals: Use edible dried rose petals for a delicate, floral look. Gently press them into the glaze while it’s wet.
Glittering Finish: Sprinkle edible glitter or sparkling sugar on top of the glaze for an added touch of elegance.
Color Variations: Add more or less food coloring to adjust the shade of the glaze to match your theme or mood.
These cookies are light, buttery, and have a delicate floral flavor, making them perfect for weddings, tea parties, or special occasions. Enjoy!
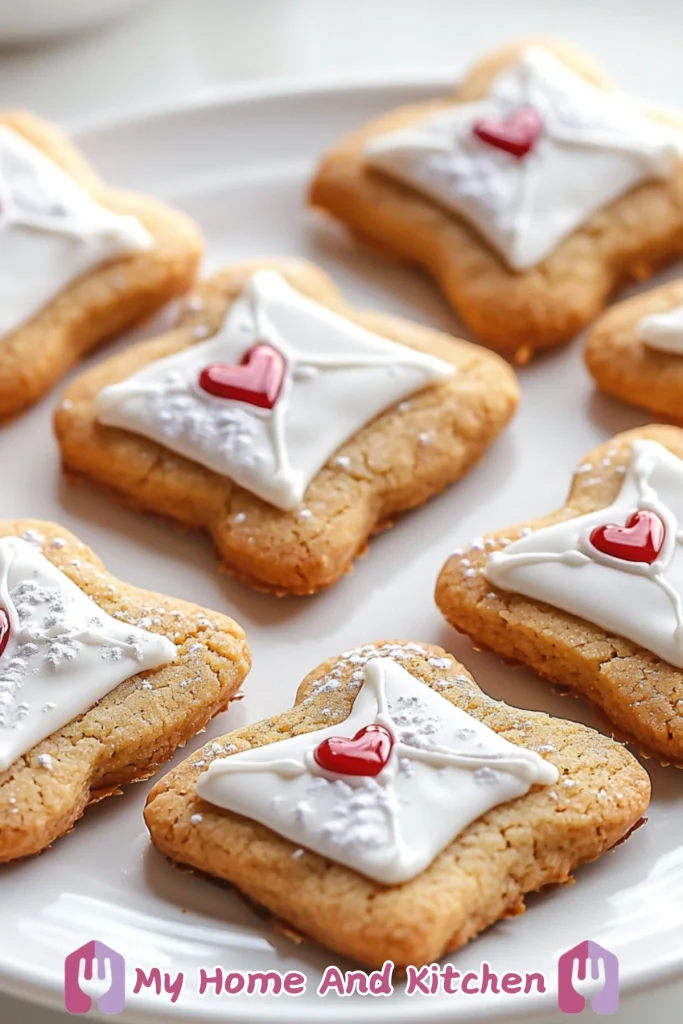
Recipe 8 : Soft and Chewy Love Letter Cookies Recipe
These charming sugar cookies are shaped like love letters, complete with white icing “envelopes” and tiny red heart seals. Perfect for sending a sweet message!
Ingredients:
For the cookies:
1 cup (226g) unsalted butter, softened
1 cup (200g) granulated sugar
1/2 cup (100g) brown sugar, packed
1 large egg
1 teaspoon vanilla extract
2 3/4 cups (345g) all-purpose flour
1/2 teaspoon baking powder
1/4 teaspoon salt
For the royal icing:
2 cups (250g) powdered sugar
2–3 tablespoons milk or water
1 teaspoon vanilla or almond extract
Gel food coloring (red and white)
For decoration:
Red heart-shaped candy or royal icing hearts
Powdered sugar (optional, for dusting)Ingredients:
For the cookies:
1 cup (226g) unsalted butter, softened
1 cup (200g) granulated sugar
1/2 cup (100g) brown sugar, packed
1 large egg
1 teaspoon vanilla extract
2 3/4 cups (345g) all-purpose flour
1/2 teaspoon baking powder
1/4 teaspoon salt
For the royal icing:
2 cups (250g) powdered sugar
2–3 tablespoons milk or water
1 teaspoon vanilla or almond extract
Gel food coloring (red and white)
For decoration:
Red heart-shaped candy or royal icing hearts
Powdered sugar (optional, for dusting)
Instructions:
Prepare the Dough:
In a large mixing bowl, cream the butter, granulated sugar, and brown sugar until light and fluffy.
Mix in the egg and vanilla extract.
In a separate bowl, whisk together the flour, baking powder, and salt. Gradually add the dry ingredients to the wet mixture, mixing until a soft dough forms.
Wrap the dough in plastic wrap and refrigerate for at least 1 hour.
Shape and Bake:
Preheat your oven to 350°F (175°C) and line a baking sheet with parchment paper.
Roll out the chilled dough to about 1/4 inch thick on a floured surface.
Use a square or envelope-shaped cookie cutter to cut out shapes and place them 2 inches apart on the baking sheet.
Bake for 8–10 minutes, or until the edges are just golden. Let the cookies cool completely on a wire rack.
Prepare the Royal Icing:
In a bowl, mix the powdered sugar, milk or water, and extract until smooth. The consistency should be slightly thick but spreadable.
Divide the icing into two bowls. Leave one white and color the other with red gel food coloring.
Decorate the Cookies:
Use the white royal icing to outline and flood the envelope shape on each cookie. Let it set for 10–15 minutes.
Pipe the folds of the envelope (triangular flaps) using a fine tip with the same white icing.
Add a small red heart at the center of the envelope flap using either a red candy or the red royal icing.
Optionally, dust the cookies with powdered sugar for an elegant touch.
Let Set:
Allow the icing to set completely before serving or packaging the cookies.
Decoration Tips:
Heart Details: If making hearts with icing, use a piping bag with a fine tip for precision.
Sparkle: Add edible glitter or a touch of luster dust to make them look magical.
Personalized Touch: Write small messages on the cookies using edible markers for a creative twist.
These cookies are perfect for Valentine’s Day, weddings, or just to send a sweet message to someone you love. Enjoy baking and sharing!
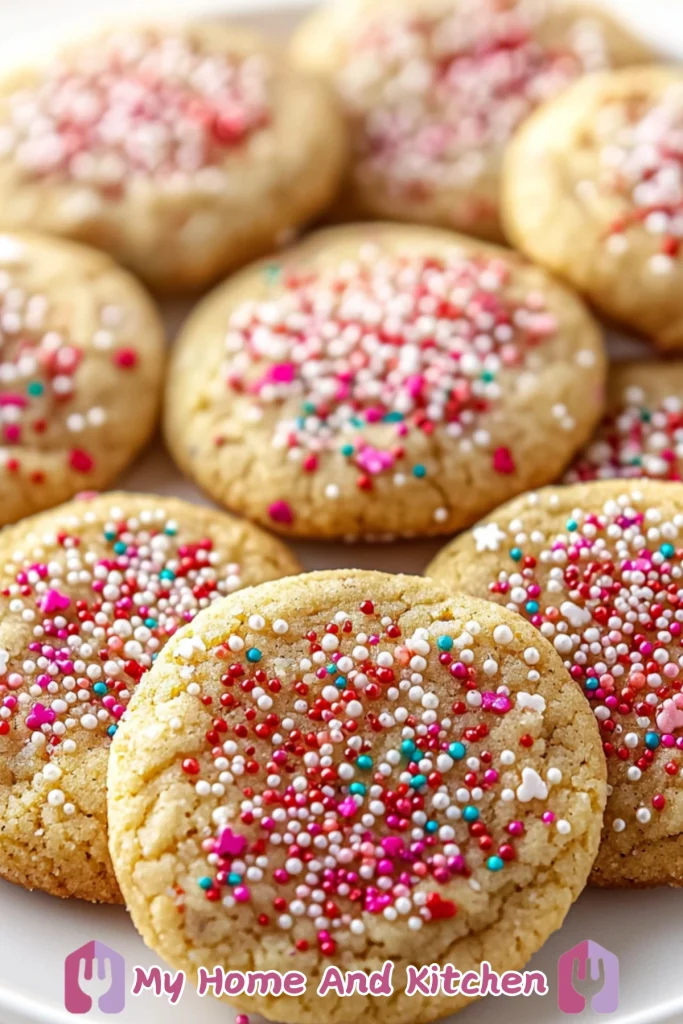
Recipe 9 : Funfetti Cookies Recipe
Soft sugar cookies rolled in festive Valentine’s sprinkles. These are fun, colorful, and super easy to make!
Ingredients:
For the cookies:
1 cup (226g) unsalted butter, softened
1 cup (200g) granulated sugar
1/2 cup (100g) brown sugar, packed
2 large eggs
1 tablespoon vanilla extract
2 3/4 cups (345g) all-purpose flour
1 teaspoon baking soda
1/2 teaspoon baking powder
1/2 teaspoon salt
1/2 cup (80g) rainbow
Instructions:
Prepare the Dough:
In a large mixing bowl, cream together the softened butter, granulated sugar, and brown sugar until light and fluffy.
Mix in the eggs one at a time, followed by the vanilla extract.
In a separate bowl, whisk together the flour, baking soda, baking powder, and salt.
Gradually add the dry ingredients to the wet mixture, mixing until a soft dough forms.
Fold in the sprinkles, being careful not to overmix to avoid bleeding colors.
Shape the Cookies:
Preheat your oven to 350°F (175°C) and line baking sheets with parchment paper.
Scoop about 1.5 tablespoons of dough and roll into balls. Gently press the tops into a small plate of extra sprinkles to coat.
Place the dough balls 2 inches apart on the prepared baking sheets.
Bake:
Bake for 10–12 minutes, or until the edges are lightly golden, and the centers look slightly soft.
Allow the cookies to cool on the baking sheet for 5 minutes, then transfer them to a wire rack to cool completely.
Decoration Tips:
Extra Sprinkles: Press additional sprinkles onto the tops of the dough balls before baking for a fun and festive look.
Custom Themes: Use color-coordinated sprinkles for holidays, birthdays, or special occasions (e.g., pink, red, and white for Valentine’s Day).
Glittery Finish: Add edible glitter or sparkling sugar on top of the sprinkles for extra sparkle.
These cookies are soft, chewy, and loaded with festive sprinkles, making them perfect for celebrations or any day you want a touch of happiness! Enjoy baking!
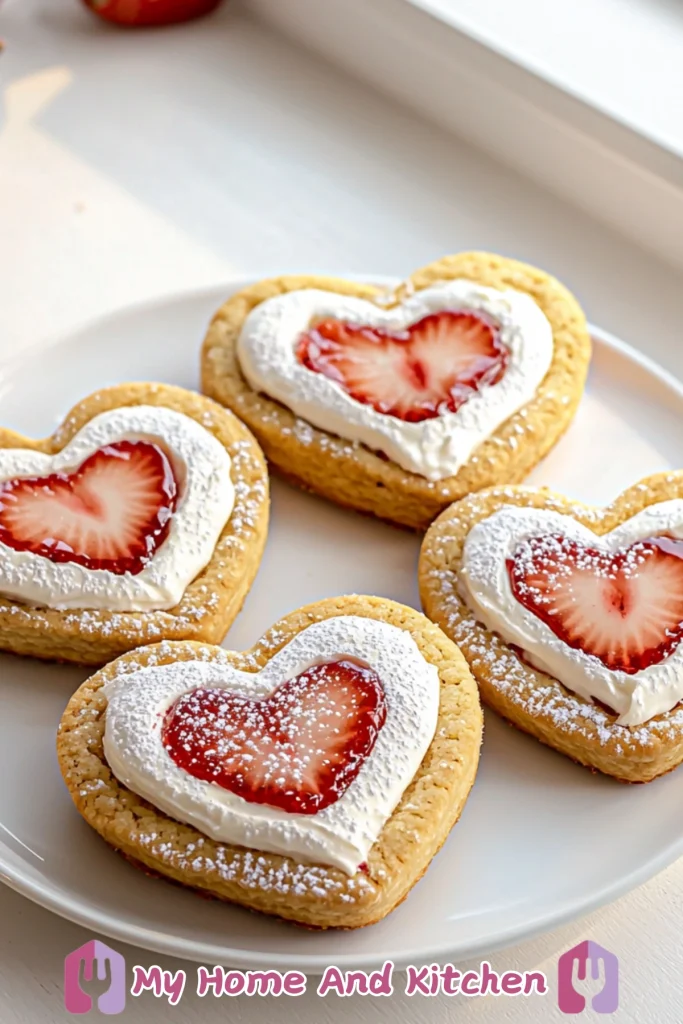
Recipe 10: Strawberry & Cream Heart Cookies Recipe
Heart-shaped sugar cookies topped with whipped cream and fresh strawberry slices. These are as delicious as they are photogenic!
Ingredients:
For the cookies:
1 cup (226g) unsalted butter, softened
3/4 cup (150g) granulated sugar
1 large egg
1 teaspoon vanilla extract
2 1/2 cups (310g) all-purpose flour
1/4 teaspoon salt
For the filling:
1/2 cup (120ml) heavy whipping cream
1/4 cup (30g) powdered sugar
1/2 teaspoon vanilla extract
1/2 cup (120g) strawberry jam
Fresh strawberries, thinly sliced
For decoration:
Powdered sugar (for dusting)
Instructions:
Prepare the Cookie Dough:
In a mixing bowl, cream together the butter and granulated sugar until light and fluffy.
Add the egg and vanilla extract, mixing until fully incorporated.
Gradually add the flour and salt, mixing until the dough forms.
Wrap the dough in plastic wrap and refrigerate for at least 1 hour.
Shape and Bake:
Preheat your oven to 350°F (175°C) and line baking sheets with parchment paper.
Roll out the chilled dough to about 1/4-inch thickness on a floured surface.
Use a heart-shaped cookie cutter to cut out cookies. For half the cookies, use a smaller heart cutter to cut out the center, creating a “window” for the top layer.
Place the cookies on the prepared baking sheets and bake for 8–10 minutes, or until the edges are lightly golden.
Let the cookies cool completely on a wire rack.
Prepare the Filling:
In a bowl, whip the heavy cream, powdered sugar, and vanilla extract until soft peaks form.
Assemble the Cookies:
Spread a thin layer of strawberry jam on the base of each whole cookie.
Pipe or spread the whipped cream around the edges of the cookie, leaving the center exposed.
Gently place a fresh strawberry slice in the center of the cream.
Top with the “window” cookie and press down lightly.
Decorate:
Dust the assembled cookies with powdered sugar for an elegant finish.
Decoration Tips:
Perfect Hearts: Use cookie cutters of varying sizes for precise shapes.
Strawberry Shine: Lightly glaze the fresh strawberries with a bit of warm jam for extra shine.
Customization: Add a drizzle of melted white chocolate over the top for an extra touch of elegance.
These cookies are perfect for Valentine’s Day or as a sweet treat for any special occasion. Enjoy baking and sharing!
Recipe 11: Sweetheart Sugar Cookies Recipe
These classic heart-shaped sugar cookies are decorated with pastel royal icing and pearl-like sprinkles. A simple yet elegant way to say “I love you.”

Ingredients:
For the sugar cookies:
1 cup (226g) unsalted butter, softened
1 cup (200g) granulated sugar
1 large egg
1 teaspoon vanilla extract
1/2 teaspoon almond extract (optional)
3 cups (375g) all-purpose flour
1/2 teaspoon baking powder
1/4 teaspoon salt
For the royal icing:
3 cups (360g) powdered sugar
2–3 tablespoons meringue powder
5–6 tablespoons water (adjust for consistency)
Gel food coloring (red, pink, white)
For decoration:
Edible pearls
Piping bags with small tips
Toothpicks for fine details
Instructions:
Prepare the Cookie Dough:
In a large bowl, cream together the softened butter and granulated sugar until light and fluffy.
Mix in the egg, vanilla extract, and almond extract (if using) until fully incorporated.
In a separate bowl, whisk together the flour, baking powder, and salt. Gradually add the dry ingredients to the wet ingredients and mix until a soft dough forms.
Divide the dough in half, flatten into discs, and wrap in plastic wrap. Refrigerate for at least 1 hour.
Shape and Bake:
Preheat your oven to 350°F (175°C) and line baking sheets with parchment paper.
Roll out the chilled dough on a floured surface to about 1/4 inch thick. Use a heart-shaped cookie cutter to cut out cookies.
Place the cookies 2 inches apart on the baking sheets and bake for 8–10 minutes, or until the edges are just beginning to turn golden.
Let the cookies cool completely on a wire rack.
Prepare the Royal Icing:
In a bowl, combine the powdered sugar and meringue powder. Add water gradually, mixing until the icing reaches a thick but pipeable consistency.
Divide the icing into separate bowls and color them with gel food coloring as desired.
Adjust the consistency: thinner icing for flooding and thicker icing for outlining or details.
Decorate the Cookies:
Use a piping bag with a fine tip to outline the heart shapes with royal icing. Let it set for a few minutes.
Flood the outlined area with a thinner icing, spreading it gently with a toothpick to cover evenly.
While the icing is still wet, add edible pearls or sprinkles for decoration.
Use a different color of icing to pipe designs like dots, swirls, or infinity signs after the base icing has set.
Let Set:
Allow the decorated cookies to dry completely for at least 4–6 hours before serving or packaging.
Decoration Tips:
Smooth Icing: Work quickly to flood the cookies and use a toothpick to pop any air bubbles for a polished look.
Layering Designs: Let each layer of icing dry before adding another for clean, defined designs.
Personal Touch: Write short messages or initials with a fine-tipped piping bag for a unique, heartfelt touch.
These cookies are perfect for Valentine’s Day, anniversaries, or any occasion to spread some love. Enjoy crafting these delightful treats!
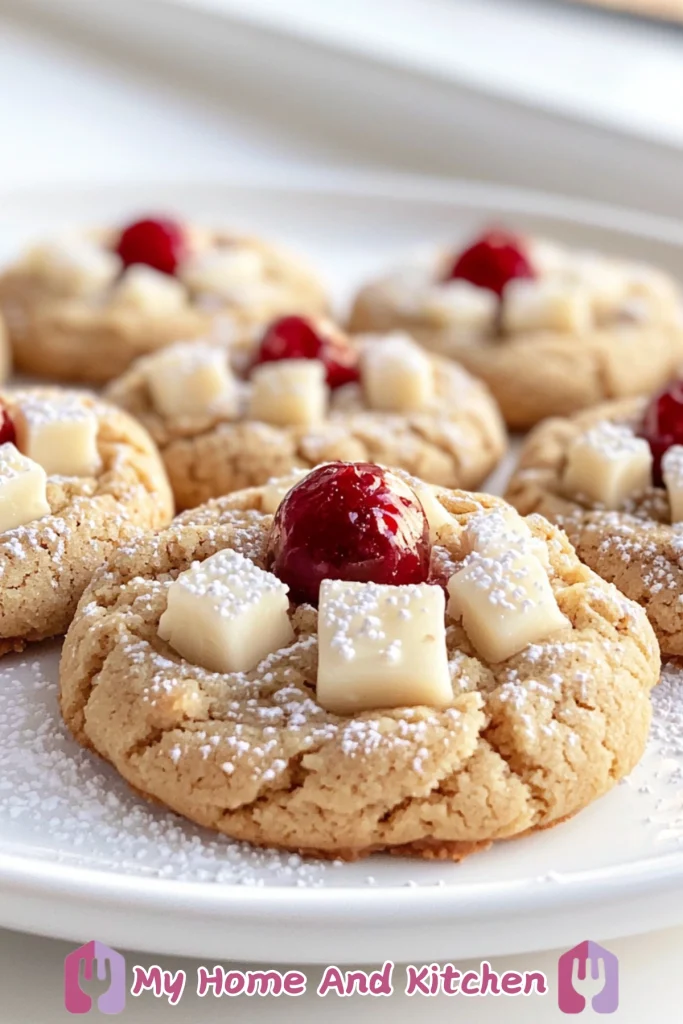
Recipe 12: White Chocolate Cherry Blossom Cookies Recipe
These delightful cookies are flavored with almond, topped with maraschino cherries, and sprinkled with powdered sugar. Sweet and nostalgic!
Ingredients:
For the cookies:
1 cup (226g) unsalted butter, softened
1 cup (200g) granulated sugar
1/2 cup (100g) brown sugar, packed
1 large egg
1 teaspoon vanilla extract
2 1/2 cups (315g) all-purpose flour
1 teaspoon baking soda
1/4 teaspoon salt
For the toppings:
1/2 cup (90g) white chocolate, chopped into small pieces or chips
Maraschino cherries (drained and patted dry)
Powdered sugar (for dusting)
Instructions:
Prepare the Dough:
In a mixing bowl, cream together the softened butter, granulated sugar, and brown sugar until light and fluffy.
Mix in the egg and vanilla extract until fully incorporated.
In a separate bowl, whisk together the flour, baking soda, and salt. Gradually add the dry ingredients to the wet mixture, mixing until a soft dough forms.
Shape and Bake:
Preheat your oven to 350°F (175°C) and line a baking sheet with parchment paper.
Scoop about 1.5 tablespoons of dough and roll into balls. Place them on the baking sheet, spacing them 2 inches apart.
Gently press the center of each cookie to create a small well.
Bake for 10–12 minutes, or until the edges are golden but the centers remain soft.
Add the Toppings:
Remove the cookies from the oven and immediately press a maraschino cherry into the center of each cookie.
While the cookies are still warm, sprinkle the white chocolate pieces around the cherry so they soften slightly and stick to the cookie.
Cool and Decorate:
Let the cookies cool completely on the baking sheet before transferring to a wire rack.
Once cooled, dust the cookies with powdered sugar for an elegant finish.
Decoration Tips:
Cherry Glaze: For added shine, brush the cherries with a little warmed cherry syrup or jam.
White Chocolate Design: Melt some white chocolate and drizzle it over the cookies for an extra decorative touch.
Custom Toppings: Add a sprinkle of edible glitter or fine coconut flakes for a festive look.
These cookies are perfect for any occasion with their rich buttery flavor, the sweetness of white chocolate, and the juicy cherry center. Enjoy baking and sharing these delightful treats!
Final Thoughts
With these delightful recipes, your Valentine’s Day is guaranteed to be sweeter than ever. Whether you go for the decadent Chocolate Heart Cookies, the playful Sprinkle Sugar Cookies, or the romantic Strawberry Heart Cookies, there’s something here for everyone you love.
So, grab your favorite ingredients, get creative, and don’t forget to PIN IT NOW TO SAVE FOR LATER on Pinterest—or share your baking masterpieces in the comments.
Happy Valentine’s Day! ❤️